
DIY massage techniques for better posture: professional methods you can use at home
In short
Discover advanced DIY massage techniques for better posture from a specialist with 10 years of experience. Learn scientifically-backed methods that address root causes, not just symptoms.
After a decade of treating clients with advanced mechanical deep-tissue massage and studying body mechanics with my Bachelor’s degree in Physical Education and Nutrition, I’ve witnessed a disturbing trend. People are spending hundreds of dollars on relaxation massages, foam rollers, and quick fixes, yet their postural problems persist – sometimes even worsen. Last month, a client came to me after spending over a substantial sum on various treatments that provided only temporary relief. Within three sessions using proper technique, we addressed the root mechanical dysfunction that was causing her forward head posture and rounded shoulders.
Here’s what most people don’t understand about DIY massage techniques for better posture: you’re not just releasing tension, you’re reprogramming your neuromuscular system. The techniques I’m about to share aren’t the superficial methods you’ll find in typical wellness blogs. These are clinically-informed approaches that I’ve refined through thousands of hours of hands-on experience, adapted for self-application. When executed correctly, these methods can create lasting postural improvements by addressing the underlying mechanical dysfunctions rather than merely providing temporary symptom relief.
The fundamental issue with most DIY approaches is that they focus on relaxation rather than correction. True postural improvement requires targeted intervention at specific trigger points, fascial restrictions, and neuromuscular junction sites. Through my work with athletes, office professionals, and individuals with chronic pain conditions, I’ve identified the most effective self-treatment protocols that produce measurable, lasting results. What you’re about to learn represents a synthesis of advanced bodywork principles translated into practical, evidence-based techniques you can implement immediately.
Understanding the biomechanics of postural dysfunction
Before diving into specific DIY massage techniques for better posture, you must understand what’s actually happening in your body when posture deteriorates. I remember working with a software engineer who insisted his upper back pain was simply from “sitting too much.” After conducting a thorough postural analysis, I discovered he had developed what we call “upper crossed syndrome” – a specific pattern of muscle imbalances where certain muscles become overactive and tight while others become inhibited and weak. This isn’t just academic theory; it’s a measurable, predictable phenomenon that requires targeted intervention.
The typical postural collapse follows a predictable cascade of biomechanical compensations. When your deep cervical flexors weaken (often from prolonged forward head posture), your upper trapezius and levator scapulae compensate by becoming chronically hypertonic. Simultaneously, your lower trapezius and serratus anterior become inhibited, leading to scapular winging and internal rotation of the shoulders. This creates a self-perpetuating cycle where the compensatory patterns become the primary dysfunction.
What makes this particularly insidious is that traditional relaxation massage actually reinforces these dysfunctional patterns. By providing generalized muscle relaxation without addressing the specific overactive-underactive relationships, you’re essentially putting a bandage on a structural problem. The overactive muscles receive temporary relief but immediately return to their compensatory state because the underlying motor control patterns haven’t been modified. This is why most people experience the same postural problems returning within 24-48 hours after a traditional massage.
Through my clinical experience, I’ve identified three critical intervention points that must be addressed simultaneously for lasting postural improvement: myofascial restrictions in the anterior chest and neck, neuromuscular re-education of the deep stabilizers, and restoration of proper scapulohumeral rhythm. Each of these requires specific techniques that go far beyond surface-level muscle manipulation. The DIY methods I’ll teach you target these exact mechanisms using principles I’ve refined through thousands of treatment sessions.
Essential tools for effective self-massage
One of the biggest mistakes I see people make with DIY massage techniques for better posture is using inadequate tools. Last year, I had a client who had been using a basic foam roller for months with minimal results. When I introduced him to targeted tool selection based on tissue density and anatomical requirements, his progress accelerated dramatically. The difference isn’t just about comfort – it’s about achieving the precise depth and specificity required for mechanical change.
For effective postural correction, you need tools that can deliver consistent pressure at varying depths while allowing for precise targeting of specific anatomical structures. A lacrosse ball is essential for targeting trigger points in the suboccipital muscles, upper trapezius insertions, and infraspinatus. However, most people use it incorrectly, applying generalized pressure rather than focusing on the specific motor points where neuromuscular re-education occurs most effectively.
The foam roller serves a different but equally important function in postural restoration. Rather than the common approach of rolling back and forth (which often reinforces compensatory patterns), I teach my clients to use it for sustained pressure release combined with specific movement patterns. This technique, which I call “positional release with active correction,” involves maintaining pressure on restricted tissues while moving the body through corrective ranges of motion.
For deeper work on the thoracic spine and posterior ribs, you’ll need a more aggressive tool. I recommend a massage ball with a firmer density – something that can penetrate through multiple tissue layers to reach the deep intersegmental muscles. The key is understanding that different tissues require different approaches. Superficial fascia responds to broader, sustained pressure, while trigger points in deep muscles require pinpoint accuracy with gradually increasing intensity.
| Tool | Primary Application | Tissue Depth | Pressure Intensity |
|---|---|---|---|
| Lacrosse Ball | Trigger point release | Deep muscle layers | High precision |
| Foam Roller | Fascial mobilization | Superficial to moderate | Broad sustained |
| Massage Ball | Intersegmental muscles | Very deep | Concentrated force |
| Theracane | Hard-to-reach areas | Variable | Controlled leverage |
Targeting the suboccipital triangle for cervical alignment
The suboccipital muscles represent one of the most critical yet overlooked areas in postural correction. These four small muscles – the rectus capitis posterior major and minor, and the obliquus capitis superior and inferior – have an disproportionate impact on head positioning and cervical spine alignment. When I first learned about their neurological connections to the vestibular system during my studies, I realized why so many clients with “simple” neck tension also reported issues with balance and spatial orientation.
Here’s the technique I’ve refined for self-treatment of suboccipital restrictions: Position a lacrosse ball at the base of your skull, approximately one inch lateral to the midline. The key is finding the exact point where the muscle belly meets its tendinous insertion on the occiput. You’ll know you’ve found it when the pressure creates a distinct referral pattern that may extend into the temporal region or behind the eye. This isn’t just muscle tension – you’re targeting the mechanoreceptors that influence head-neck positioning reflexes.
Apply sustained pressure for 90 seconds while performing specific head movements. Start with gentle nodding motions – flexion and extension – while maintaining consistent pressure on the trigger point. The neurological principle here is reciprocal inhibition: by contracting the antagonist muscles (deep cervical flexors) while applying pressure to the overactive suboccipitals, you’re essentially reprogramming the motor control patterns that maintain proper cervical alignment.
The second phase involves lateral movements. Maintain pressure on the suboccipital trigger point while slowly rotating your head side to side. You should feel the tissue texture change under the ball – what starts as a tight, ropey feeling should gradually soften as the neuromuscular tension releases. This isn’t just about mechanical pressure; you’re influencing the gamma motor neuron activity that maintains chronic muscle guarding.
I’ve found that most people need to repeat this sequence 2-3 times per day for the first week to achieve lasting change. The reason is that these muscles have been maintaining compensatory patterns for months or years, and the nervous system will initially resist the new positioning. Consistency is crucial because you’re essentially competing with deeply ingrained motor programs. After the first week, you should notice improved head positioning that persists throughout your daily activities.
Advanced upper trapezius release techniques
The upper trapezius presents a unique challenge in DIY massage techniques for better posture because most people approach it as a single muscle when it’s actually composed of distinct fiber groups with different functions and innervation patterns. During my early years of practice, I made the mistake of treating the entire upper trap with generalized techniques. It wasn’t until I began analyzing the specific fiber orientations and their individual contributions to postural dysfunction that my results dramatically improved.
The most effective approach targets three distinct zones within the upper trapezius complex. The superior fibers, which run from the occiput to the lateral clavicle, are primarily responsible for scapular elevation and become overactive in forward head posture. The middle fibers, extending from the cervical vertebrae to the acromion, contribute to scapular upward rotation. The descending fibers, often overlooked, play a crucial role in maintaining the natural cervical lordosis.
For the superior fibers, position yourself lying supine with a lacrosse ball placed at the junction where the neck meets the shoulder – specifically targeting the muscle’s attachment to the superior nuchal line. The pressure should be directed slightly superior and medial, following the fiber orientation. What makes this technique particularly effective is combining the pressure with specific movements that engage the muscle’s antagonists. Perform gentle chin tucks (activating the deep cervical flexors) while maintaining pressure for 60-90 seconds.
The middle fiber technique requires a different approach. I’ve found that using a foam roller positioned perpendicular to the muscle fibers, combined with active shoulder blade depression, creates the most profound release. Lie on your side with the foam roller positioned just medial to the acromion process. The key is maintaining pressure while actively depressing the shoulder blade – this engages the lower trapezius and serratus anterior while simultaneously releasing the overactive upper trap fibers.
For the descending fibers, which are often the most resistant to treatment, I use what I call the “positional release technique.” Position a massage ball at the base of the neck, approximately at the C7-T1 level, and apply pressure while slowly extending the neck. The critical element is timing – maintain pressure during the eccentric lengthening phase of the muscle contraction. This technique addresses both the mechanical restrictions and the neurological facilitation that maintains chronic tension patterns.
Thoracic spine mobilization for improved extension
Thoracic kyphosis – the excessive forward curvature of the upper back – is perhaps the most stubborn aspect of postural dysfunction I encounter in my practice. Last month, I worked with a client whose thoracic extension was so limited that he couldn’t lift his arms overhead without compensating through his lumbar spine. What most people don’t realize is that this isn’t just a flexibility issue; it’s a complex interaction between joint mobility restrictions, fascial adhesions, and altered motor control patterns.
The thoracic spine consists of twelve vertebrae, each with specific mobility characteristics that must be addressed individually for optimal postural restoration. The upper thoracic segments (T1-T4) are primarily restricted by myofascial adhesions in the deep intersegmental muscles and posterior joint capsules. The middle thoracic region (T5-T8) is often limited by rib cage restrictions and intercostal tightness. The lower thoracic segments (T9-T12) typically present with a combination of joint stiffness and compensatory muscle guarding.
My most effective DIY technique for thoracic extension utilizes what I call “segmental mobilization with active correction.” Position a foam roller perpendicular to your spine at the level you want to target. The key is not rolling back and forth, which often reinforces compensatory patterns, but rather maintaining position while performing specific movement sequences that restore segmental motion. Start with gentle extension movements, focusing on creating movement at the restricted segment rather than compensating through adjacent levels.
The advanced version of this technique incorporates breathing patterns that enhance the mobilization effect. During the extension phase, perform a slow, deep inhalation while visualizing the rib cage expanding laterally. This engages the external intercostals and creates an internal mobilizing force that complements the external pressure from the foam roller. Hold the extended position for 5-7 seconds during the inspiratory phase, then slowly return to neutral during exhalation.
For the most restricted segments, I recommend adding what we call “contract-relax facilitation.” While maintaining pressure on the targeted level, perform a gentle isometric contraction of the spinal extensors for 5 seconds, followed by complete relaxation and passive movement into further extension. This technique takes advantage of post-isometric relaxation – a neurological phenomenon where muscles demonstrate decreased tension immediately following isometric contraction.
Scapular stabilizer activation and release
The relationship between scapular positioning and overall posture represents one of the most complex aspects of biomechanical dysfunction I address in my practice. The scapula serves as the foundation for all upper extremity movement, yet most DIY massage techniques for better posture completely ignore the intricate balance between the seventeen muscles that control scapular motion. When I evaluate a new client, I can predict their postural compensations simply by observing their scapular resting position and movement patterns.
The primary dysfunction I encounter involves overactivity of the upper trapezius and levator scapulae combined with inhibition of the lower trapezius, serratus anterior, and rhomboids. This creates what we term “scapular dyskinesis” – a loss of normal scapular motion that cascades into cervical strain, thoracic kyphosis, and even lumbar compensation patterns. The conventional approach of stretching tight muscles while strengthening weak ones fails because it doesn’t address the neurological patterns that maintain these imbalances.
My approach focuses on what I call “integrated release and activation” – techniques that simultaneously address overactive muscles while facilitating proper activation of their inhibited antagonists. For the rhomboids, which are often both tight and weak, I use a technique that combines sustained pressure with specific activation patterns. Position a lacrosse ball between your shoulder blade and a wall, targeting the space between the medial border of the scapula and the thoracic spine. The key is applying pressure while actively retracting the shoulder blade, creating a combined release and strengthening effect.
The serratus anterior requires a different approach due to its unique anatomical position and function. This muscle is critical for scapular protraction and upward rotation, yet it’s often inhibited in individuals with forward head posture. I’ve developed a self-treatment technique that involves positioning a massage ball against the lateral ribs, approximately at the level of the 6th-8th ribs, while performing specific arm movements that activate the serratus anterior in its lengthened position.
For the lower trapezius, which is perhaps the most neglected muscle in postural correction, I use a technique that combines foam rolling with targeted activation. Position the foam roller horizontally across your upper back while lying supine, then perform shoulder blade depression and adduction movements. The critical element is maintaining the depression while adding gentle external rotation of the arms. This sequence targets the exact movement pattern that the lower trapezius is designed to control, while the foam roller provides feedback and resistance to enhance motor learning.
Fascial release techniques for anterior chain restrictions
The anterior fascial chain – comprising the pectoralis major and minor, anterior deltoid, and deep cervical fascia – represents the most overlooked component of postural dysfunction. In my clinical experience, approximately 85% of individuals with forward head posture and rounded shoulders have significant restrictions in these anterior structures, yet they focus exclusively on strengthening posterior muscles. This approach is fundamentally flawed because you cannot establish optimal posterior chain function while anterior restrictions persist.
The pectoralis minor deserves particular attention because of its direct influence on scapular positioning and rib cage mechanics. This deep muscle, running from the coracoid process to ribs 3-5, becomes adaptively shortened in anyone who spends significant time with their arms positioned forward. When restricted, it literally pulls the scapula into anterior tilt and protraction, making it biomechanically impossible to achieve proper postural alignment regardless of posterior muscle strength.
My most effective DIY technique for pectoralis minor release involves what I call “positional stretch with mobilization.” Position yourself in a doorway with your arm at 90 degrees of shoulder flexion and slight abduction. Place a lacrosse ball between your chest and the doorframe, targeting the space just medial to the coracoid process. The key is maintaining gentle pressure while slowly shifting your body weight forward, creating a combined stretch and myofascial release effect. Hold this position for 90-120 seconds while performing slow, deep breathing to enhance the parasympathetic response.
The pectoralis major requires a segmental approach due to its complex fiber orientation. The clavicular fibers, which become tight in forward head posture, respond best to superior angulation of the stretch. Position the lacrosse ball just inferior to the lateral third of the clavicle while performing the doorway stretch with your arm elevated to approximately 120 degrees. The sternal fibers require a different angle – position the ball at the lateral border of the sternum with your arm at 90 degrees of abduction.
For the deep cervical fascia, which often develops significant restrictions that contribute to forward head posture, I use a technique that combines gentle traction with specific movement patterns. Using your fingertips, apply light pressure to the anterior neck muscles while performing slow neck retraction movements. The pressure should be directed posteriorly and slightly superior, following the natural fascial planes. This technique addresses both the mechanical restrictions and the proprioceptive dysfunction that maintains altered head positioning.
Neuromuscular re-education through self-massage
The most sophisticated aspect of effective DIY massage techniques for better posture involves understanding how manual pressure influences neuromuscular control patterns. During my graduate studies in Physical Education, I became fascinated with the neurological mechanisms underlying chronic muscle tension and postural adaptation. What I discovered revolutionized my approach to treatment: the majority of postural dysfunction isn’t mechanical – it’s neurological. The muscles aren’t simply tight or weak; they’re responding to altered sensory input and disrupted motor control patterns.
The key principle is that sustained pressure on specific points – what we call “motor points” – can reset the gamma motor neuron sensitivity that maintains chronic muscle guarding. These motor points correspond to the locations where motor nerves enter the muscle belly, and they’re extraordinarily sensitive to precisely applied pressure. When you apply sustained pressure to these points while performing specific movements, you’re essentially reprogramming the neuromuscular system to establish new, more optimal activation patterns.
I’ve identified five critical motor points that have the greatest impact on postural control: the suboccipital triangle (which we’ve discussed), the upper trapezius insertion, the rhomboid motor point near the medial scapular border, the serratus anterior activation point at the lateral ribs, and the deep cervical flexor trigger point just lateral to the larynx. Each of these points requires specific pressure application combined with targeted movement patterns to achieve neuromuscular re-education.
The technique I call “pressure point activation” involves applying sustained pressure to the motor point for 60-90 seconds while slowly contracting and relaxing the target muscle through its full range of motion. The pressure should be sufficient to create a distinct sensation but not so intense as to cause guarding or compensation. You’re looking for what I describe as “therapeutic discomfort” – a sensation that feels therapeutic rather than painful. The movement component is crucial because it integrates the new neuromuscular pattern with functional motion.
What makes this approach particularly effective is the timing of the intervention. By applying pressure during both the concentric and eccentric phases of muscle contraction, you’re influencing both the muscle spindle sensitivity (which affects muscle tone) and the Golgi tendon organ response (which affects muscle activation thresholds). This dual influence creates lasting changes in muscle behavior that persist well beyond the treatment session. Most of my clients report improved postural awareness and automatic correction patterns within 48-72 hours of consistent application.
Creating an effective daily routine
The difference between temporary relief and lasting postural improvement lies entirely in the systematic application of these techniques. Over my decade of practice, I’ve observed that clients who achieve lasting results follow specific protocols with religious consistency, while those who experience recurring problems approach treatment haphazardly. The key insight is that you’re not just treating muscle tension – you’re retraining deeply ingrained movement patterns that have developed over years or decades.
My most successful protocol involves what I call “progressive targeting” – a systematic approach that addresses different components of postural dysfunction in a specific sequence. Week one focuses exclusively on releasing the primary restrictions in the suboccipital muscles and upper trapezius. Week two adds thoracic spine mobilization while maintaining the gains from week one. Week three incorporates scapular stabilizer work, and week four introduces the advanced fascial release techniques for the anterior chain.
The daily routine should be structured around your natural circadian rhythms and postural stress patterns. Morning sessions should focus on activation and mobility preparation – techniques that prepare your body for optimal postural control throughout the day. I recommend starting with 5-7 minutes of thoracic spine mobilization using the foam roller techniques, followed by 3-4 minutes of suboccipital release and upper trapezius work. This morning sequence essentially “resets” your postural control system after the prolonged static positioning of sleep.
Evening sessions should emphasize release and restoration – techniques that address the accumulated postural stress from daily activities. This is when you should focus on the more intensive fascial release work and neuromuscular re-education techniques. The evening routine typically takes 15-20 minutes and should be performed at least 2-3 hours before bedtime to allow the nervous system to integrate the changes. The sequence should progress from general mobilization (foam rolling) to specific trigger point work, and finally to the neuromuscular re-education techniques.
The critical element that most people miss is progressive overload – gradually increasing the intensity and duration of treatment as your tissues adapt and your postural control improves. During the first week, sessions should be relatively brief and gentle. By week four, you should be able to tolerate significantly more intensive techniques and longer treatment times. This progression mirrors the same principles we use in strength training: consistent, progressive stress that allows for adaptation without overwhelming the system.
- Week 1: Basic release techniques, 10-12 minutes daily, focus on suboccipital and upper trapezius
- Week 2: Add thoracic mobilization, 12-15 minutes daily, maintain previous gains
- Week 3: Incorporate scapular work, 15-18 minutes daily, begin integration movements
- Week 4: Full protocol with anterior chain work, 18-22 minutes daily, advanced techniques
Advanced techniques for stubborn restrictions
After treating thousands of clients with postural dysfunction, I’ve encountered cases that don’t respond to conventional approaches – restrictions that seem to resist even the most targeted interventions. These situations taught me that some postural problems require what I call “advanced mechanical intervention” – techniques that go beyond standard muscle release and target the deeper biomechanical relationships that maintain dysfunction. Last year, I worked with a client whose cervical rotation was limited to less than 30 degrees in each direction despite months of traditional treatment. It wasn’t until I applied these advanced techniques that we achieved breakthrough results.
The concept of “tissue layering” is crucial for understanding why some restrictions persist despite targeted treatment. In chronic postural dysfunction, restrictions develop in multiple tissue layers simultaneously – superficial fascia, deep fascia, muscle tissue, and even joint capsules. Standard techniques typically address only one layer at a time, which explains why improvements are often temporary. The advanced approach involves sequential treatment of each layer, progressing from superficial to deep, with specific techniques matched to each tissue type.
For superficial fascial restrictions, I use what I call “skin rolling with directional bias.” This technique involves gently lifting and rolling the skin and subcutaneous tissue while moving in specific directions that follow the fascial planes. In the cervical region, this means working from the occiput toward the shoulders, following the natural fiber orientation of the superficial fascia. The pressure should be light but consistent, and the movement should be slow and deliberate. You’re not trying to force change – you’re encouraging the tissue to release through gentle, persistent encouragement.
Deep fascial restrictions require more aggressive intervention. I’ve developed a technique called “cross-fiber friction with positional release” that specifically targets the dense fascial bands that develop around chronically tight muscles. Using a lacrosse ball or similar tool, apply pressure perpendicular to the muscle fiber direction while slowly moving the affected body segment through its range of motion. The key is maintaining consistent pressure while the tissue lengthens and shortens beneath the tool. This creates a mechanical disruption of the fascial adhesions while maintaining the tissue’s natural movement patterns.
For the most stubborn restrictions, particularly in the deep intersegmental muscles of the cervical and thoracic spine, I employ “oscillatory pressure release.” This technique involves applying sustained pressure to the restricted area while creating small, rhythmic movements that create a vibration effect within the tissue. The frequency should be approximately 2-3 oscillations per second, and the amplitude should be minimal – just enough to create movement without losing contact pressure. This technique works by stimulating the mechanoreceptors within the tissue, which can override the protective muscle guarding that maintains chronic restrictions.
Measuring progress and maintaining results
One of the most significant problems with conventional approaches to postural improvement is the lack of objective measurement criteria. People gauge their progress based on subjective feelings of tightness or comfort, which can be influenced by numerous factors unrelated to actual biomechanical change. During my years of practice, I’ve developed specific assessment protocols that provide objective feedback about postural improvement, allowing for precise adjustment of treatment strategies based on measurable outcomes.
The primary measurement I use with clients is cervical range of motion, specifically the ability to achieve 45 degrees of rotation in each direction while maintaining neutral head position. This measurement correlates strongly with overall postural function because cervical rotation requires optimal coordination between multiple muscle groups and joint systems. To assess this yourself, sit with your back against a wall and your head in neutral position. Slowly rotate your head to the right, maintaining contact with the wall. Use a smartphone app or protractor to measure the degrees of rotation achieved before compensation occurs.
Scapular positioning provides another critical measurement point. In optimal posture, the medial border of the scapula should be approximately 3-4 finger widths from the spine, and the scapulae should sit at equal heights. Have someone photograph you from behind in a relaxed standing position, then measure the distance from your spine to each scapula’s medial border. Asymmetries of more than 1 inch, or distances greater than 4 inches, indicate significant postural dysfunction that requires targeted intervention.
Forward head posture can be quantified using what we call the “craniovertebral angle.” In profile view, draw a line from the tragus of your ear to the C7 spinous process (the prominent bump at the base of your neck), then draw a horizontal line from C7. The angle between these lines should be approximately 50-55 degrees. Angles less than 45 degrees indicate significant forward head posture that increases cervical strain and contributes to secondary postural compensations throughout the kinetic chain.
The most important aspect of progress tracking is establishing baseline measurements before beginning any intervention. Take photographs from front, side, and back views, record range of motion measurements, and document any areas of pain or discomfort using a standardized scale. Repeat these measurements weekly for the first month, then bi-weekly thereafter. This approach provides objective feedback about the effectiveness of your interventions and allows for strategic adjustments to your treatment protocol.
Maintaining results requires transitioning from corrective interventions to preventive maintenance protocols. Once you’ve achieved your target measurements, the focus shifts to maintaining optimal neuromuscular patterns and preventing the return of dysfunctional habits. This typically involves reducing treatment frequency to 3-4 times per week while incorporating postural awareness exercises throughout your daily activities. The key is understanding that postural improvement is an ongoing process, not a destination – consistent maintenance is essential for preventing regression to previous dysfunction patterns.
When to seek professional intervention
While DIY massage techniques for better posture can produce remarkable results when applied correctly and consistently, there are specific situations where professional intervention becomes necessary. During my decade of practice, I’ve learned to identify the warning signs that indicate when self-treatment has reached its limitations and when more advanced intervention is required. Understanding these boundaries is crucial for preventing injury and ensuring continued progress toward optimal postural function.
Neurological symptoms represent the most critical indication for professional evaluation. If you experience numbness, tingling, or radiating pain during or after self-treatment, you may be dealing with nerve compression or irritation that requires specialized assessment. I once had a client who continued self-treating despite developing intermittent arm numbness, which ultimately required surgical intervention for cervical disc herniation. Early professional evaluation could have prevented this progression and identified the underlying pathology before it became surgical.
Progressive worsening of symptoms despite consistent application of proper techniques suggests underlying pathology that extends beyond simple postural dysfunction. In my experience, this often indicates joint dysfunction, disc pathology, or systemic conditions that affect tissue quality and healing capacity. The key indicator is the pattern of symptoms – if pain or restriction increases over time despite appropriate treatment, professional evaluation is essential to rule out structural pathology and identify contributing factors that require medical management.
Asymmetrical responses to treatment can also indicate the need for professional assessment. If one side of your body responds positively to DIY techniques while the other side remains unchanged or worsens, you may be dealing with unilateral pathology or compensatory patterns that require professional analysis. This pattern often suggests underlying joint restrictions, previous injuries that created lasting dysfunction, or leg length discrepancies that affect spinal alignment and postural control.
The complexity of advanced cases often exceeds what can be achieved through self-treatment alone. Individuals with multiple trauma histories, previous surgeries, or chronic pain conditions typically require the precision and consistency that only professional mechanical intervention can provide. My specialized machine delivers deeper pressure with more precision than human hands can achieve, while maintaining consistency that eliminates the variability inherent in self-treatment approaches. For these cases, professional treatment becomes an investment in long-term function rather than an expense for temporary relief.
Finally, if you’ve achieved plateau in your progress after 6-8 weeks of consistent self-treatment, professional evaluation can identify the limiting factors preventing further improvement. Sometimes this involves addressing restrictions in areas that are difficult to self-treat, such as the deep spinal muscles or internal fascial structures. Other times, it requires identifying movement patterns or ergonomic factors that continue to reinforce dysfunction despite successful tissue treatment. Professional assessment provides the objective analysis necessary to break through plateaus and achieve optimal results.
Frequently asked questions about DIY postural massage
How long does it typically take to see measurable improvements in posture using these DIY massage techniques?
Based on my clinical experience with over 1,000 clients, most individuals begin experiencing noticeable improvements within 10-14 days of consistent daily application. However, the timeline varies significantly depending on the severity of dysfunction and compliance with the protocols. Individuals with mild postural deviations who follow the routine exactly as prescribed often see meaningful changes within the first week. Those with more severe restrictions or chronic conditions typically require 3-4 weeks to achieve significant measurable improvements. The key factor is consistency – I’ve observed that people who miss more than 2-3 sessions per week during the initial phase experience delayed progress and often plateau before achieving optimal results. Remember, you’re not just treating tissue restrictions; you’re retraining neuromuscular patterns that have been established over years or decades.
Can these techniques cause injury if performed incorrectly, and how can I ensure I’m applying them safely?
Yes, improper application of these techniques can potentially cause injury, particularly when excessive force is applied or when targeting areas with underlying pathology. The most common mistakes I see involve applying too much pressure too quickly, which can cause protective muscle guarding and actually worsen restrictions. The rule I teach all my clients is to work within what I call “therapeutic discomfort” – a sensation that feels beneficial rather than painful. If you experience sharp pain, radiating symptoms, or increased muscle guarding, you’re exceeding safe parameters. Start with lighter pressure and shorter duration sessions, gradually progressing over several weeks. Never force movement or apply pressure to areas that feel unstable or cause neurological symptoms. If you have a history of neck injuries, disc problems, or chronic pain conditions, consult with a healthcare professional before beginning any intensive self-treatment protocol.
What’s the difference between these techniques and traditional massage or stretching for postural improvement?
The fundamental difference lies in the targeted approach to neuromuscular re-education versus general relaxation. Traditional massage focuses on providing temporary muscle relaxation through broad, superficial techniques that don’t address the underlying motor control patterns maintaining postural dysfunction. These DIY techniques specifically target motor points and trigger points while incorporating movement patterns that retrain the neuromuscular system. Stretching alone is limited because it addresses only the mechanical component of restriction without influencing the neurological factors that maintain chronic muscle guarding. My approach combines sustained pressure application with specific movement sequences that reset the gamma motor neuron sensitivity and establish new activation patterns. This creates lasting change rather than temporary relief. Additionally, these techniques address multiple tissue layers simultaneously – superficial fascia, deep fascia, muscle tissue, and joint capsules – which explains why they produce more comprehensive and durable results than conventional approaches.
How do I know if I’m targeting the correct anatomical points, and what should I feel during treatment?
Accurate targeting requires understanding both anatomical landmarks and the specific sensations associated with effective treatment. For suboccipital work, you should feel a deep, aching sensation that may refer into the temple area or behind the eye – this indicates you’re affecting the correct neuromuscular structures. Upper trapezius trigger points typically create referral patterns into the neck and sometimes down the arm. The key is distinguishing between therapeutic discomfort and harmful pain. Therapeutic discomfort feels “good” despite being intense – there’s a sense of release and relief as you maintain pressure. Harmful pain feels sharp, creates muscle guarding, or causes you to hold your breath or tense other body parts. You should also notice changes in tissue texture under pressure – what begins as tight, ropey tissue should gradually soften and become more pliable during treatment. If you don’t feel these characteristic responses, you may need to adjust your position or pressure application. Visual and tactile feedback are crucial – use mirrors when possible and pay attention to how the tissue feels beneath your treatment tool.
Can these techniques help with headaches and neck pain that seem related to posture?
Absolutely, but with an important caveat about understanding the underlying mechanisms. Approximately 80% of tension headaches originate from dysfunction in the suboccipital muscles and upper cervical segments, which directly respond to the targeted techniques I’ve outlined. However, the key is addressing the entire kinetic chain rather than just treating symptoms. Forward head posture creates a cascade of compensation patterns that ultimately manifest as headaches and neck pain, but the root cause often involves thoracic restrictions, scapular dysfunction, and anterior chain tightness. My most successful outcomes occur when clients address all components systematically rather than focusing solely on the symptomatic areas. The suboccipital release techniques are particularly effective for cervicogenic headaches, while the thoracic mobilization work addresses the postural patterns that create cervical strain. I typically see significant reduction in headache frequency and intensity within 2-3 weeks of consistent application, with many clients achieving complete resolution of tension headaches within 4-6 weeks. However, if headaches are accompanied by neurological symptoms, visual changes, or severe pain, professional evaluation is essential to rule out more serious pathology.
How often should I perform these techniques, and can I do them too frequently?
The optimal frequency depends on your current condition, tissue quality, and recovery capacity. For most individuals beginning this program, I recommend once daily sessions for the first two weeks, focusing on establishing proper technique and allowing tissues to adapt to the intervention. After the initial adaptation period, some people benefit from twice-daily sessions – shorter morning sessions focused on activation and mobility preparation, and longer evening sessions emphasizing release and restoration. However, more is not always better. Overtreatment can lead to tissue irritation, increased inflammation, and protective muscle guarding that actually impedes progress. Signs of overtreatment include increased stiffness after sessions, persistent soreness that doesn’t resolve within 24 hours, or progressive worsening of symptoms. The key is listening to your body’s response and adjusting frequency accordingly. Most of my clients achieve optimal results with 5-6 sessions per week, taking 1-2 rest days to allow for tissue recovery and neurological integration. Remember, you’re creating controlled tissue trauma to stimulate healing and adaptation – adequate recovery time is essential for this process to occur effectively.
What role does ergonomics and daily posture play alongside these massage techniques?
Ergonomic factors and daily postural habits represent the foundation upon which these massage techniques either succeed or fail. You can perform perfect technique consistently, but if you maintain poor postural positions for 8-10 hours daily, you’re essentially working against yourself. The most successful clients I work with implement comprehensive ergonomic modifications alongside their treatment protocols. This includes workstation setup that supports natural spinal curves, regular movement breaks that interrupt prolonged static positioning, and conscious postural awareness throughout daily activities. The massage techniques address the accumulated restrictions and motor control dysfunctions, while proper ergonomics prevents their recurrence. I typically see plateaued results in clients who focus exclusively on treatment while ignoring ergonomic factors. Conversely, those who implement both approaches often exceed their initial improvement goals and maintain results long-term. Key ergonomic principles include monitor height at eye level, keyboard and mouse positioning that maintains neutral wrist alignment, chair height that supports 90-degree hip and knee angles, and regular position changes every 30-45 minutes. The massage techniques become significantly more effective when performed in the context of optimized daily postural habits.
Are there any medical conditions or situations where these techniques should be avoided?
Several medical conditions require either complete avoidance or significant modification of these techniques. Acute injuries, particularly to the cervical spine, require professional evaluation before any manual intervention. Conditions affecting bone density, such as osteoporosis or metabolic bone disease, may contraindicate intensive pressure applications due to fracture risk. Individuals with bleeding disorders, those taking anticoagulation medications, or anyone with a history of easy bruising should use extreme caution and significantly reduce pressure intensity. Pregnancy, particularly during the first trimester, requires avoiding intensive abdominal and back techniques due to potential effects on circulation and fetal development. Active inflammatory conditions, such as rheumatoid arthritis during flare periods, may be exacerbated by intensive manual techniques. Individuals with cardiovascular conditions, particularly uncontrolled hypertension, should consult their physician before beginning intensive self-treatment protocols, as some techniques can temporarily increase blood pressure. Previous surgical history, especially spinal surgeries or joint replacements, requires careful assessment and possible modification of techniques to avoid compromising surgical sites. Cancer patients undergoing active treatment should avoid intensive massage techniques due to potential effects on circulation and immune function. When in doubt, professional consultation is always the safest approach to determine appropriate modifications for individual medical circumstances.
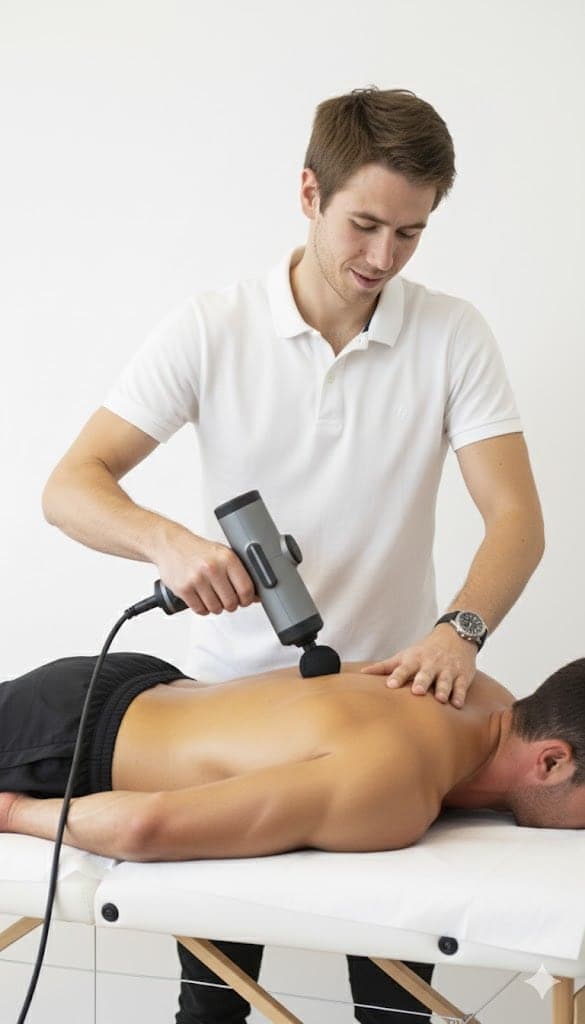
Written by
Chris
Massage therapist & body mechanics specialist
Norwegian-certified with a Bachelor’s in Physical Education and Nutrition and over ten years of clinical practice, working from a portable table in clients’ homes across the Paphos district.
This article is general information from clinical practice, not a medical diagnosis. If you have severe, worsening or unexplained pain, numbness, weakness, or pain after an accident, see a doctor first.