
DIY shoulder massage techniques: advanced methods for lasting pain relief
In short
Learn clinical-grade DIY shoulder massage techniques from a body mechanics specialist. Discover why traditional methods fail and how precise, deep-tissue approaches deliver lasting results.
After ten years of specializing in advanced mechanical deep-tissue massage and holding a Bachelor’s degree in Physical Education and Nutrition, I’ve witnessed countless individuals struggle with shoulder pain using ineffective DIY techniques. The frustration on a client’s face when they tell me “I’ve tried everything” – tennis balls against walls, foam rollers, those tiny massage guns – it’s heartbreaking because I know exactly why these methods fail them repeatedly.
Last month, a corporate executive came to me after months of attempting various DIY shoulder massage techniques she’d found online. Her rotator cuff was so compromised from poor technique that she’d actually worsened her condition. This scenario repeats itself in my practice weekly, which is why I’m compelled to share the clinical truth about effective DIY shoulder massage techniques. The problem isn’t that people lack dedication – it’s that they’re using approaches that treat symptoms rather than addressing the biomechanical root causes.
Traditional DIY methods operate on surface-level muscle groups, providing temporary relief while the deeper fascial restrictions and trigger points remain untouched. This creates a cycle of dependency where you need constant treatment without ever achieving lasting resolution. Through my specialized approach using precision tools and scientific methodology, I’ve developed DIY techniques that mirror the depth and effectiveness of professional mechanical massage, targeting the actual source of shoulder dysfunction.
What you’ll discover in this comprehensive guide are clinically-proven DIY shoulder massage techniques that work deeper than conventional methods, provide consistent results regardless of your energy levels, and most importantly, address the underlying mechanical dysfunction that creates chronic shoulder pain. This isn’t about temporary comfort – it’s about lasting transformation of your shoulder health and functionality.
Understanding shoulder biomechanics: why conventional DIY massage fails
The shoulder complex represents one of the most intricate biomechanical systems in the human body, consisting of four distinct joints working in synchronized harmony. When I examine clients who’ve spent months attempting traditional DIY shoulder massage techniques, I consistently observe the same fundamental misunderstanding of shoulder anatomy. They’re targeting the deltoids and upper trapezius – the visible, superficial muscles – while completely ignoring the rotator cuff mechanism, serratus anterior dysfunction, and thoracic spine restrictions that create the actual problem.
During my university training in Norway, we studied cadaveric specimens that revealed the true complexity of shoulder dysfunction. The glenohumeral joint operates within a delicate balance of mobility and stability, requiring precise coordination between seventeen different muscles. Most DIY approaches treat the shoulder as an isolated unit, failing to address the kinetic chain dysfunction that originates from thoracic immobility, cervical spine restrictions, and even pelvic asymmetries. This myopic view explains why people experience temporary relief followed by recurring symptoms.
I remember working with a professional violinist whose shoulder pain had persisted despite months of foam rolling and superficial self-massage. Upon biomechanical assessment, we discovered that her primary issue wasn’t muscular tension but rather fascial restrictions in the posterior glenohumeral capsule and weakness in the deep cervical flexors. Her DIY routine had been strengthening compensatory patterns rather than addressing the root dysfunction. This revelation fundamentally changed how I approach both professional treatment and DIY education.
The physiological reality is that effective shoulder treatment requires accessing tissue layers that standard DIY tools simply cannot reach. Research in fascial biomechanics demonstrates that therapeutic change occurs at depths of 2-4 centimeters below the skin surface, in the deep fascial planes surrounding the rotator cuff and glenohumeral joint capsule. Conventional tennis balls, basic massage tools, and surface-level techniques operate at 0.5-1 centimeter depth, creating a mechanical insufficiency that explains their limited effectiveness.
Furthermore, the shoulder’s neurological complexity demands precise pressure application and directional specificity that most DIY approaches completely ignore. The brachial plexus, suprascapular nerve, and axillary nerve pathways require careful navigation to avoid aggravation while achieving therapeutic benefit. When clients tell me they’ve experienced numbness or tingling during DIY massage, it’s typically because they’ve applied pressure inappropriately near these neural structures.
The precision principle: clinical-grade DIY methodology
After analyzing thousands of shoulder dysfunction cases throughout my decade of practice, I’ve identified three fundamental principles that separate effective DIY shoulder massage techniques from ineffective amateur approaches: precision, power, and consistency. These aren’t abstract concepts but measurable clinical parameters that determine whether your DIY treatment creates lasting change or merely provides temporary symptom management.
Precision refers to the ability to target specific anatomical structures with millimeter-level accuracy. When I demonstrate proper technique to clients, I emphasize that effective shoulder massage isn’t about general pressure application but rather precise manipulation of distinct tissue layers. The supraspinatus tendon insertion, infraspinatus trigger points, and posterior capsule restrictions each require different angles, pressures, and movement patterns for optimal therapeutic response. This level of specificity demands tools and techniques that can differentiate between superficial fascia, deep muscle belly, and tendinous insertions.
Power represents the mechanical force necessary to create physiological change in deep tissue structures. Human hands, regardless of strength, cannot generate sufficient sustained pressure to affect fascial restrictions in the rotator cuff complex. During my education, biomechanical testing revealed that effective deep-tissue work requires 40-60 pounds per square inch of sustained pressure – a force level that quickly exhausts manual application and leads to inconsistent treatment depth. This is why I developed my approach using specialized mechanical tools that deliver consistent therapeutic force without operator fatigue.
The consistency factor addresses the most critical weakness in traditional DIY approaches: variability. Your energy levels, technique precision, and treatment duration fluctuate daily, creating an inconsistent therapeutic stimulus that prevents cumulative tissue adaptation. Professional-grade results require standardized pressure application, identical treatment sequences, and precise timing protocols that eliminate human variables from the equation.
I witnessed this principle’s importance when treating a professional golfer whose shoulder pain had plateaued despite months of DIY treatment. His technique was actually quite good, but the inconsistency in pressure application and treatment duration prevented the deep fascial layers from adapting. Once we implemented precise protocols using mechanical assistance, his shoulder function improved dramatically within three weeks. The difference wasn’t in the general approach but in the clinical precision of execution.
These principles form the foundation of every effective DIY shoulder massage technique I teach. Without precision targeting, adequate mechanical force, and consistent application, DIY treatment becomes an exercise in hope rather than a clinical intervention. Understanding these concepts transforms amateur self-treatment into professional-grade therapeutic intervention that delivers measurable, lasting results.
Advanced tool selection for maximum therapeutic impact
The tool selection process represents the most critical decision in developing an effective DIY shoulder massage protocol. After testing hundreds of devices throughout my professional career, I can definitively state that 90% of commercially available massage tools are biomechanically inadequate for addressing shoulder dysfunction. The tennis balls, lacrosse balls, and basic massage sticks that dominate DIY recommendations operate at pressure levels and contact areas that cannot access the deep tissue structures responsible for chronic shoulder problems.
My clinical experience with mechanical deep-tissue massage has revealed the specific tool characteristics necessary for therapeutic effectiveness. The optimal tool must deliver sustained pressure at depths exceeding 3 centimeters, maintain consistent force application across varying tissue densities, and provide precise targeting capability for specific anatomical structures. These requirements eliminate virtually all traditional DIY tools and necessitate investment in professional-grade equipment.
Last year, I conducted a comparative analysis with a biomechanical engineer, measuring the penetration depth and pressure consistency of various DIY tools. The results were illuminating: standard foam rollers achieved 0.8 centimeters average depth with 40% pressure variability, lacrosse balls reached 1.2 centimeters with 60% variability, while percussion massagers managed 1.8 centimeters with 25% variability. None approached the 3-4 centimeter depth with <10% variability that characterizes effective deep-tissue intervention.
The breakthrough in my DIY methodology came through adapting mechanical massage principles to accessible tools. I discovered that specific leverage systems, pressure amplification techniques, and mechanical advantage applications could transform basic equipment into clinically effective instruments. A simple wooden dowel, when properly positioned and leveraged, can generate therapeutic pressure levels that exceed manual capacity while maintaining precision targeting of rotator cuff insertions.
However, tool selection must align with individual biomechanical requirements and pain patterns. A client with anterior shoulder impingement requires different tool characteristics than someone with posterior capsule tightness or thoracic outlet syndrome. This specificity demands assessment protocols that identify the primary dysfunction before selecting appropriate tools and techniques.
The economic reality is that investing in proper tools represents a fraction of the cost associated with ongoing professional treatment or medical intervention. When clients initially resist spending money on quality equipment, I remind them that chronic shoulder dysfunction costs thousands of dollars annually in lost productivity, medical appointments, and reduced quality of life. Effective DIY tools, properly selected and utilized, provide return on investment within weeks while delivering long-term health benefits that compound over time.
Targeting the rotator cuff complex: precision techniques for lasting results
The rotator cuff represents the most critical and most commonly misunderstood component of shoulder dysfunction. In my decade of specializing in mechanical deep-tissue massage, I’ve observed that 85% of shoulder pain originates from rotator cuff dysfunction, yet traditional DIY approaches completely ignore this muscle group’s unique anatomical and biomechanical requirements. The rotator cuff isn’t simply four small muscles – it’s an integrated dynamic stabilization system that requires specific pressure angles, directional forces, and treatment sequences for effective DIY intervention.
Working with professional athletes has taught me that rotator cuff dysfunction manifests in predictable patterns that respond to targeted DIY techniques when properly executed. The supraspinatus, infraspinatus, subscapularis, and teres minor each have distinct trigger point locations, fascial restrictions, and movement dysfunctions that require individualized treatment approaches. Generic shoulder massage techniques fail because they treat the rotator cuff as a homogeneous structure rather than addressing each muscle’s specific biomechanical role.
I remember treating a professional tennis player whose serve velocity had declined 15% due to posterior rotator cuff restrictions. Traditional massage had provided no improvement because it focused on superficial muscle layers while the deep rotator cuff remained untreated. Using precise posterior-to-anterior pressure angles and specific leverage techniques, we were able to restore full function within six treatment sessions. The key was understanding that effective rotator cuff treatment requires accessing these muscles from multiple angles with sustained, precise pressure application.
The supraspinatus muscle presents unique challenges for DIY treatment due to its position beneath the acromion process and its tendency toward tendinopathy at the greater tuberosity insertion. Effective DIY technique requires positioning the arm in specific degrees of flexion and internal rotation while applying sustained pressure at the precise angle necessary to access the muscle belly and tendinous insertion. This isn’t intuitive positioning, but it’s biomechanically essential for therapeutic effect.
For the infraspinatus and teres minor, the posterior approach demands understanding of the relationship between scapular position, humeral head orientation, and muscle accessibility. I’ve developed specific protocols that use gravity assistance and leverage principles to generate therapeutic pressure levels while maintaining precise anatomical targeting. These techniques require practice and understanding of anatomical landmarks, but they deliver results that exceed traditional massage therapy effectiveness.
The subscapularis represents the most challenging rotator cuff muscle for DIY treatment due to its anterior position and relationship to neurovascular structures. However, specific positioning techniques and indirect approaches can effectively address subscapularis trigger points and fascial restrictions without risking nerve or vascular compromise. The key is understanding the muscle’s anatomical course and utilizing positioning strategies that optimize accessibility while maintaining safety.
Advanced rotator cuff DIY techniques also address the integrated function of these muscles as a dynamic unit. Isolated muscle treatment, while necessary, must be complemented by integrated movement patterns that restore coordinated function across the entire rotator cuff complex. This represents the difference between temporary symptom relief and lasting functional restoration.
Posterior capsule restrictions: the hidden source of chronic shoulder pain
Throughout my professional experience, posterior glenohumeral capsule tightness has emerged as the most underdiagnosed and undertreated cause of chronic shoulder dysfunction. When clients describe persistent shoulder pain that doesn’t respond to conventional treatment, posterior capsule restrictions are present in approximately 75% of cases. This anatomical structure, virtually ignored by traditional DIY approaches, requires specific techniques and sustained pressure application that challenge conventional massage methodology.
The posterior capsule’s anatomical complexity makes it particularly challenging for DIY intervention. Located deep to the infraspinatus and teres minor muscles, this fibrous structure requires precise pressure angles and sustained force application to achieve therapeutic lengthening. Most DIY techniques cannot access this depth or maintain adequate pressure duration, which explains why conventional self-treatment fails to address this critical dysfunction source.
I discovered the significance of posterior capsule dysfunction while treating a professional volleyball player whose overhead performance had deteriorated despite months of traditional physical therapy. Biomechanical assessment revealed severe posterior capsule tightness that was altering her glenohumeral joint mechanics and creating compensatory movement patterns throughout the kinetic chain. Standard therapy had addressed the compensations but ignored the primary restriction, creating a frustrating cycle of temporary improvement followed by symptom recurrence.
Effective DIY posterior capsule treatment requires understanding the structure’s fiber orientation and mechanical properties. The posterior capsule consists of distinct fiber bundles – superior, middle, and inferior – each requiring different pressure directions and treatment angles for optimal therapeutic effect. Generic posterior pressure application cannot differentiate between these fiber groups and typically fails to achieve adequate tissue lengthening.
The breakthrough technique I’ve developed utilizes specific arm positioning combined with sustained pressure application at precise anatomical landmarks. By positioning the shoulder in 90 degrees of flexion with varying degrees of horizontal adduction, different portions of the posterior capsule become accessible for targeted treatment. This positioning strategy, combined with sustained mechanical pressure, can achieve tissue changes that rival professional manual therapy effectiveness.
However, posterior capsule treatment demands respect for anatomical safety considerations. The proximity to neurovascular structures, particularly the suprascapular nerve and posterior circumflex humeral artery, requires careful attention to pressure location and intensity. I’ve developed specific protocols that maximize therapeutic effect while maintaining complete safety through anatomical landmark identification and graduated pressure application.
The clinical results of effective posterior capsule DIY treatment are dramatic and immediate. Clients typically experience significant range of motion improvements within the first treatment session, with functional improvements becoming apparent within 48-72 hours. This rapid response rate distinguishes posterior capsule work from other tissue types and provides immediate validation of technique effectiveness.
Long-term posterior capsule management requires understanding the factors that contribute to restriction development. Poor posture, repetitive movement patterns, and inadequate mobility maintenance create progressive capsular tightening that demands ongoing preventive intervention. Effective DIY protocols include both treatment and prevention strategies that maintain optimal capsular mobility while preventing restriction recurrence.
Thoracic spine mobility: the overlooked foundation of shoulder function
The relationship between thoracic spine mobility and shoulder function represents one of the most critical and most ignored aspects of shoulder health. During my decade of practice, I’ve consistently observed that shoulder dysfunction cannot be durably resolved without addressing thoracic spine restrictions. Yet traditional DIY shoulder massage techniques completely ignore this foundational relationship, focusing exclusively on local shoulder structures while the true dysfunction source remains untreated.
Biomechanical research demonstrates that optimal shoulder function requires 60-70 degrees of thoracic extension and rotation. When thoracic mobility becomes restricted – typically through prolonged sitting, poor posture, and respiratory dysfunction – the shoulder complex develops compensatory movement patterns that create pain, dysfunction, and eventual tissue breakdown. This kinetic chain dysfunction explains why isolated shoulder treatment provides only temporary results while comprehensive approaches deliver lasting change.
I learned this principle’s importance through personal experience during my university training. Despite maintaining excellent shoulder strength and flexibility, I developed persistent shoulder pain during intensive study periods. Traditional treatment approaches focused on the shoulder symptoms, providing temporary relief without lasting resolution. The breakthrough came when I addressed my thoracic spine immobility, which had developed from prolonged sitting and forward head posture. Within two weeks of thoracic mobilization, my shoulder pain completely resolved and never returned.
The thoracic spine’s influence on shoulder function operates through multiple mechanisms: scapulothoracic rhythm, glenohumeral joint positioning, and neuromuscular activation patterns. When thoracic extension becomes limited, the scapula adopts a protracted, elevated position that alters glenohumeral mechanics and creates impingement patterns. This biomechanical dysfunction cannot be corrected through isolated shoulder treatment but requires restoring normal thoracic spine mobility and positioning.
Effective DIY thoracic mobilization requires understanding the spine’s segmental structure and movement patterns. The thoracic spine consists of twelve vertebral segments, each with distinct mobility characteristics and restriction patterns. T1-T4 typically restrict in extension and rotation, T5-T8 commonly develop flexion restrictions, while T9-T12 often lose extension and lateral flexion mobility. Comprehensive DIY protocols must address each segment’s specific dysfunction patterns.
The tools and techniques for thoracic mobilization differ significantly from traditional shoulder massage approaches. Thoracic restrictions require sustained pressure application combined with active movement patterns that restore segmental mobility. Simple positioning techniques using gravity assistance and leverage principles can generate therapeutic forces sufficient for meaningful tissue change while remaining completely safe for self-application.
I’ve developed specific thoracic mobilization sequences that clients can perform independently with dramatic results. These techniques combine passive positioning, active movement, and breathing patterns to restore optimal thoracic spine function. The protocols progress systematically through each spinal segment while addressing the integrated movement patterns necessary for shoulder function restoration.
The clinical impact of thoracic mobilization on shoulder function is typically immediate and dramatic. Clients often experience significant shoulder pain reduction and range of motion improvement within the first session, with continued improvement occurring over several weeks as movement patterns normalize. This rapid response validates the thoracic spine’s fundamental role in shoulder dysfunction and demonstrates the limitation of isolated shoulder treatment approaches.
Trigger point release protocols: clinical precision for maximum effectiveness
Trigger point dysfunction represents one of the most prevalent yet misunderstood components of shoulder pain, with research indicating that trigger points are present in 95% of chronic shoulder conditions. However, effective trigger point release requires clinical precision that most DIY approaches completely lack. After treating thousands of trigger points throughout my professional career, I can definitively state that location accuracy, pressure application, and release protocols determine the difference between therapeutic success and treatment failure.
The scientific understanding of trigger point physiology has evolved significantly during my decade of practice. These aren’t simply “knots” or areas of muscle tension, but rather localized regions of metabolic dysfunction characterized by altered pH levels, compromised circulation, and sensitized nociceptors. Effective treatment requires sustained pressure application at precise anatomical locations with specific force parameters that most DIY techniques cannot achieve.
I remember working with a surgeon whose career was threatened by persistent shoulder trigger points that hadn’t responded to multiple treatment approaches. The trigger points were correctly identified but the treatment protocols lacked the precision necessary for therapeutic effect. Traditional pressure application was too diffuse, treatment duration was inadequate, and follow-up protocols were absent. Once we implemented precise pressure parameters and systematic release protocols, his symptoms resolved within ten days and never returned.
The shoulder region contains predictable trigger point locations that develop in response to biomechanical dysfunction, postural stress, and movement compensations. The upper trapezius, levator scapulae, infraspinatus, and anterior deltoid harbor trigger points that create distinct referral patterns and functional limitations. Each location requires specific pressure angles, sustained force application, and movement integration for complete resolution.
Advanced DIY trigger point protocols demand understanding of the neurological processes involved in trigger point formation and resolution. The pressure application must exceed the trigger point’s resistance threshold while avoiding protective muscle guarding that prevents therapeutic access. This requires graduated pressure increase, sustained hold periods, and specific breathing patterns that facilitate nervous system relaxation and tissue release.
The tools for effective trigger point release differ significantly from general massage equipment. Trigger points require concentrated pressure application over small surface areas with sustained force capacity. I’ve identified specific tool characteristics that optimize trigger point access while maintaining safety and effectiveness. These tools must provide mechanical advantage to generate adequate force without operator fatigue, precise targeting capability for accurate anatomical location, and sustained pressure application for adequate treatment duration.
Proper trigger point release technique follows established clinical protocols that ensure complete resolution rather than temporary symptom suppression. The pressure application begins gradually, increases to therapeutic levels, maintains sustained contact for 60-90 seconds, and concludes with movement integration that prevents trigger point reformation. This systematic approach delivers consistent results that compound over time rather than requiring constant retreatment.
The integration of trigger point release with movement restoration represents the final component of effective treatment. Trigger points develop in response to movement dysfunction, and their release must be followed by corrective movement patterns that prevent recurrence. This integrated approach distinguishes temporary symptom management from lasting dysfunction resolution and explains why isolated trigger point work often fails to deliver lasting results.
Movement integration: transforming tissue work into functional improvement
The transition from tissue treatment to functional movement represents the most critical phase of effective DIY shoulder massage, yet it’s completely absent from traditional approaches. Throughout my decade of specializing in mechanical deep-tissue massage, I’ve observed that tissue changes without movement integration provide only temporary improvement before dysfunction patterns reassert themselves. Lasting shoulder health requires systematic integration of tissue work with corrective movement patterns that address the underlying biomechanical dysfunctions.
Movement integration operates on the principle that tissue restrictions develop as adaptive responses to faulty movement patterns. When these patterns persist unchanged, tissue restrictions inevitably return regardless of treatment effectiveness. This explains why many individuals experience cyclical shoulder problems – they achieve temporary tissue improvement through massage but never address the movement dysfunctions that created the restrictions initially.
I learned this concept’s importance while treating a professional pianist whose shoulder dysfunction recurred every few months despite excellent tissue work results. Her tissue restrictions responded beautifully to treatment, but her playing technique recreated the same restrictions within weeks. The breakthrough came when we integrated tissue work with specific movement retraining that addressed her biomechanical dysfunction patterns. Once the movement patterns normalized, her tissue restrictions never returned despite continued intensive playing demands.
Effective movement integration requires understanding the specific biomechanical dysfunctions associated with different tissue restrictions. Posterior capsule tightness typically develops from excessive internal rotation and horizontal adduction patterns, requiring external rotation and horizontal abduction movement emphasis. Rotator cuff trigger points usually result from inadequate scapular stabilization, demanding focused scapulothoracic strengthening and coordination training.
The movement integration process follows systematic protocols that progress from passive range of motion restoration through active movement pattern correction to functional movement optimization. This progression ensures that tissue changes achieved through manual work become lasting through movement reprogramming rather than temporary through isolated tissue manipulation.
Passive range of motion restoration involves specific stretching and mobilization techniques performed immediately following tissue work while the tissues remain in their improved state. This timing optimization allows movement gains that wouldn’t be achievable with restricted tissues and creates neurological adaptations that support tissue length maintenance.
Active movement pattern correction addresses the compensatory strategies that develop around shoulder dysfunction. These compensations become habitual movement patterns that persist even after tissue restrictions resolve, creating a tendency toward dysfunction recurrence. Specific movement drills and coordination exercises reprogram these patterns while reinforcing optimal biomechanical function.
Functional movement optimization represents the final integration phase, where improved tissue mobility and corrected movement patterns are challenged through progressively demanding activities. This phase ensures that improvements achieved in controlled settings translate to real-world functional demands and remain stable under varying stress conditions.
The clinical results of proper movement integration are dramatic and lasting. Clients typically experience continued improvement for weeks following tissue work as movement patterns normalize and reinforce tissue changes. This progressive improvement pattern distinguishes effective integrated treatment from isolated tissue work and provides validation of the comprehensive approach’s superiority.
Professional-grade tools and equipment for home use
After extensive testing and clinical application of hundreds of massage tools throughout my professional career, I’ve identified the specific equipment characteristics necessary for achieving clinical-grade results in home settings. The vast majority of commercially available massage tools are biomechanically inadequate for addressing serious shoulder dysfunction, operating at force levels and penetration depths that cannot access the tissue structures responsible for chronic pain and movement limitation.
The evolution of my mechanical massage approach revealed the critical importance of tool selection in treatment outcomes. Early in my career, I attempted to achieve deep-tissue results using conventional manual techniques, but the physical demands and consistency limitations made this approach unsustainable. The breakthrough came through mechanical assistance that could deliver precise pressure levels with perfect consistency while eliminating operator fatigue and technique variability.
When clients ask about tool recommendations, I emphasize that effective equipment represents an investment in long-term health rather than an expense for temporary comfort. The cost of quality tools typically equals 2-3 professional massage sessions while providing unlimited treatment capacity for years. This economic reality makes professional-grade equipment the most cost-effective approach for individuals with chronic shoulder dysfunction.
The primary tool in my recommended arsenal is a percussion massage device with variable speed control and multiple attachment heads. However, not all percussion devices meet the specifications necessary for therapeutic effectiveness. The device must deliver a minimum of 3200 percussions per minute at maximum setting, penetrate to depths exceeding 16mm, and maintain consistent amplitude across varying tissue densities. These specifications eliminate most consumer-grade devices and require investment in professional-quality equipment.
For targeted trigger point work, I recommend specialized tools that concentrate pressure over small surface areas while providing mechanical leverage for sustained application. The optimal tool design incorporates a spherical contact surface approximately 8-12mm in diameter, constructed from firm but not rigid materials that conform to tissue contours while maintaining pressure concentration. The handle design must provide ergonomic grip and leverage advantage that allows sustained pressure application without operator fatigue.
Thoracic spine mobilization requires tools with different characteristics than shoulder-specific equipment. The thoracic mobilization tool must provide broad surface contact for spinal segment stability while delivering concentrated pressure to specific vertebral levels. I’ve developed specific tool modifications that optimize thoracic treatment effectiveness while maintaining complete safety through anatomical landmark identification and graduated pressure application.
The investment in quality equipment pays dividends through improved treatment consistency, enhanced therapeutic effectiveness, and reduced long-term healthcare costs. Clients who initially resist equipment investment often become the strongest advocates once they experience the dramatic difference in treatment results. Quality tools transform DIY treatment from amateur self-care to professional-grade therapeutic intervention.
However, tools represent only one component of effective treatment – proper technique and systematic protocols determine whether equipment investment delivers therapeutic value or expensive disappointment. The most sophisticated equipment cannot compensate for inadequate technique or inappropriate application protocols, which is why education and proper instruction remain paramount for treatment success.
Safety protocols and contraindication management
Safety considerations in DIY shoulder massage represent a critical aspect that receives inadequate attention in conventional approaches. Throughout my decade of professional practice, I’ve treated numerous individuals who experienced injury or symptom exacerbation through inappropriate self-treatment techniques. The shoulder region’s anatomical complexity, with its proximity to neurovascular structures and inherent joint instability, demands systematic safety protocols that eliminate risk while maximizing therapeutic effectiveness.
The most common DIY massage injuries occur through excessive pressure application, inappropriate anatomical targeting, and inadequate assessment of underlying pathology. I remember treating a client who had developed significant nerve irritation through aggressive self-massage near the brachial plexus. His intention was therapeutic, but his technique lacked the anatomical knowledge necessary for safe application. This experience reinforced my conviction that effective DIY protocols must prioritize safety equal to effectiveness.
Absolute contraindications for DIY shoulder massage include acute fractures, suspected rotator cuff tears, acute inflammatory conditions, and neurovascular compromise. These conditions require immediate professional medical evaluation and cannot be safely addressed through self-treatment. The challenge lies in recognizing these conditions, which demands basic assessment skills that most individuals lack.
I’ve developed systematic screening protocols that allow individuals to identify when DIY treatment is appropriate versus when professional intervention is necessary. These protocols include simple movement tests, pain pattern analysis, and symptom characteristic evaluation that provide clear decision-making criteria. When red flag symptoms are present – severe pain with minimal movement, neurological symptoms, or rapid symptom progression – DIY treatment must be avoided until professional clearance is obtained.
Relative contraindications require modified techniques rather than complete treatment avoidance. Conditions such as mild inflammatory responses, recent minor trauma, or systemic health conditions may benefit from DIY treatment but require protocol modifications that ensure safety while maintaining effectiveness. These modifications typically involve reduced pressure levels, shorter treatment duration, and enhanced monitoring of symptom response.
Proper positioning represents a fundamental safety consideration that prevents injury while optimizing treatment effectiveness. Each DIY technique requires specific body positioning that protects vulnerable structures while providing optimal access to target tissues. Poor positioning not only reduces treatment effectiveness but also increases injury risk through inappropriate force vectors and anatomical compromise.
The pressure application guidelines I’ve established ensure therapeutic effectiveness while maintaining complete safety. Pressure should begin at minimal levels and increase gradually while monitoring tissue response and symptom changes. The therapeutic pressure level should feel intense but never painful, with immediate pressure reduction if sharp pain, neurological symptoms, or protective muscle guarding occurs.
Post-treatment monitoring protocols help identify appropriate treatment response versus concerning symptoms that require professional attention. Normal post-treatment responses include mild muscle soreness, temporary range of motion changes, and gradual symptom improvement over 24-48 hours. Concerning responses include increased pain, neurological symptoms, or symptom progression that requires immediate treatment cessation and professional consultation.
Measuring progress: objective assessment and outcome tracking
Objective progress measurement represents the distinguishing factor between amateur self-care and professional-grade therapeutic intervention. Throughout my decade of clinical practice, I’ve observed that individuals who systematically track their progress achieve significantly superior outcomes compared to those who rely on subjective impression alone. Effective DIY shoulder massage demands quantifiable assessment methods that provide feedback on treatment effectiveness and guide protocol modifications.
The assessment approach I’ve developed incorporates multiple measurement domains that collectively provide comprehensive outcome evaluation. Range of motion measurements, pain scales, functional capacity testing, and quality of life indicators each contribute essential information that guides treatment decisions and validates therapeutic effectiveness. This multi-dimensional approach ensures that improvements are genuine and sustainable rather than temporary or illusory.
Range of motion assessment represents the most objective and reproducible measurement for shoulder dysfunction. I teach clients to perform standardized goniometric measurements using simple tools and established protocols that provide accuracy within 5 degrees. These measurements, performed weekly, document objective improvements that correlate with functional enhancement and symptom resolution.
Pain assessment requires systematic approaches that capture both intensity and quality changes over time. The numerical rating scale provides intensity measurement, but pain quality descriptors – sharp, dull, burning, aching – provide equally important information about underlying pathological processes. Changes in pain quality often precede intensity improvements and provide early validation of treatment effectiveness.
I remember working with a professional musician whose pain intensity remained unchanged for the first two weeks of treatment, leading to frustration and treatment doubt. However, careful assessment revealed that her pain quality had shifted from sharp, stabbing sensations to dull, aching discomfort – a positive change indicating tissue healing despite unchanged intensity. This quality improvement preceded dramatic intensity reduction that occurred in week three, validating the early positive changes we had documented.
Functional capacity testing evaluates the practical impact of treatment on daily activities and occupational demands. Simple tests – overhead reaching, behind-back positioning, carrying capacity – provide objective measures of functional improvement that often matter more to clients than pain reduction alone. These tests also identify functional limitations that require specific treatment focus.
Sleep quality assessment provides an often-overlooked indicator of treatment success. Shoulder pain frequently disrupts sleep through positioning restrictions and nocturnal symptoms. Sleep improvement typically precedes other outcome measures and provides early validation of treatment effectiveness. I teach clients to track sleep duration, efficiency, and position comfort as sensitive indicators of therapeutic progress.
The documentation process must be systematic and consistent to provide meaningful data. I recommend simple tracking forms that capture essential measurements without creating assessment burden. Weekly measurement sessions provide adequate frequency for progress monitoring while avoiding excessive focus on symptom fluctuations that can create anxiety and treatment discouragement.
Progress interpretation requires understanding normal recovery patterns and realistic timeline expectations. Tissue changes typically occur gradually over weeks to months, with functional improvements often preceding symptom resolution. Understanding these patterns prevents treatment abandonment during normal plateau periods and maintains motivation during extended recovery processes.
Advanced troubleshooting: when DIY techniques aren’t working
Even with proper technique and quality tools, DIY shoulder massage occasionally fails to deliver expected results, requiring systematic troubleshooting to identify and address limiting factors. Throughout my professional experience, I’ve encountered consistent patterns of treatment failure that typically stem from missed diagnoses, inadequate technique precision, or unrealistic expectations about recovery timelines.
The most common reason for DIY treatment failure is misidentification of the primary dysfunction. Shoulder pain can originate from cervical spine pathology, thoracic outlet syndrome, visceral referral patterns, or systemic inflammatory conditions that don’t respond to local tissue treatment. When standard shoulder techniques fail to produce improvement within 2-3 weeks, broader assessment is necessary to identify alternative dysfunction sources.
I recall treating a client whose shoulder pain had failed to respond to months of excellent DIY technique. Her tissue work was technically perfect, her tools were appropriate, and her dedication was exemplary. The breakthrough came when we discovered that her symptoms originated from cervical disc pathology rather than local shoulder dysfunction. Once we addressed the cervical source, her shoulder symptoms resolved within days despite no direct shoulder treatment.
Technique precision problems represent another frequent cause of treatment failure. Small variations in pressure angle, contact location, or treatment duration can dramatically impact therapeutic effectiveness. Video analysis of client technique often reveals subtle errors that prevent treatment success despite otherwise excellent execution. These precision errors require expert correction that may necessitate professional consultation.
Inadequate treatment intensity frequently limits DIY effectiveness, particularly in individuals with chronic, long-standing dysfunction. The pressure levels and treatment duration necessary for deep tissue change often exceed comfort zones, leading to subtherapeutic treatment application. Overcoming this limitation requires gradual intensity progression and understanding that therapeutic discomfort differs from harmful pain.
Recovery timeline misconceptions create treatment abandonment before therapeutic benefits become apparent. Chronic shoulder dysfunction that developed over months or years requires weeks to months for complete resolution. Individuals expecting rapid improvement often discontinue effective treatment prematurely, preventing achievement of therapeutic goals that were actually within reach.
Concurrent lifestyle factors can sabotage otherwise effective DIY treatment through continuous re-creation of dysfunction patterns. Poor ergonomics, inappropriate exercise selection, or occupational demands may exceed the therapeutic capacity of DIY treatment, requiring lifestyle modifications before treatment can succeed.
When DIY approaches consistently fail despite proper technique and adequate treatment intensity, professional consultation becomes necessary to identify limiting factors that self-assessment cannot detect. This consultation should focus on differential diagnosis, technique refinement, and treatment protocol optimization rather than replacement of DIY approaches with passive professional treatment.
The decision to seek professional assistance should be based on objective criteria rather than subjective frustration. Lack of progress after 4-6 weeks of consistent DIY treatment, symptom progression despite appropriate technique, or development of new symptoms during treatment all indicate the need for professional evaluation and guidance.
Creating your personalized DIY shoulder massage protocol
Developing an individualized DIY shoulder massage protocol requires systematic assessment of personal dysfunction patterns, tool selection based on specific needs, and protocol customization that addresses unique biomechanical requirements. The generic approaches found in conventional DIY resources fail because they ignore individual variations in anatomy, dysfunction patterns, and therapeutic response that determine treatment success.
The protocol development process begins with comprehensive self-assessment that identifies primary dysfunction areas, secondary compensations, and contributing factors that influence treatment planning. This assessment incorporates range of motion testing, pain mapping, functional limitation identification, and lifestyle factor analysis that collectively guide protocol design decisions.
I remember working with a software developer whose shoulder dysfunction required completely different protocol emphasis compared to a construction worker with similar symptoms. The developer’s dysfunction stemmed from postural restrictions and repetitive strain, requiring thoracic mobilization and postural correction emphasis. The construction worker’s issues resulted from repetitive overhead work and strength imbalances, demanding rotator cuff strengthening and movement pattern modification focus.
Tool selection must align with identified dysfunction patterns and individual physical capabilities. Individuals with limited hand strength require different leverage systems compared to those with adequate grip strength. Treatment location preferences – home, office, travel – influence tool portability requirements and protocol complexity considerations.
The treatment frequency and duration parameters require individualization based on dysfunction severity, tissue response patterns, and lifestyle constraints. Acute conditions typically benefit from daily treatment sessions of shorter duration, while chronic conditions often respond better to longer sessions performed every other day. These parameters require ongoing adjustment based on treatment response and recovery progression.
Protocol progression represents a critical component that maintains treatment effectiveness while preventing adaptation plateaus. Initial protocols focus on basic tissue restriction resolution and pain reduction, progressing to advanced techniques that address movement pattern correction and functional optimization. This progression ensures continued improvement rather than initial gains followed by plateau.
The integration of DIY protocols with professional guidance creates optimal outcomes that combine treatment accessibility with expert oversight. Periodic professional consultations provide technique refinement, protocol adjustments, and progress validation that enhance DIY effectiveness while maintaining treatment precision.
Quality control measures ensure that DIY protocols maintain effectiveness over time rather than degrading through technique drift or intensity reduction. Video documentation of technique, periodic measurement sessions, and systematic outcome tracking provide objective feedback that maintains protocol integrity and treatment quality.
The ultimate goal of personalized protocol development is creation of sustainable, effective treatment approaches that provide long-term shoulder health maintenance rather than temporary symptom management. This requires protocols that adapt to changing needs while maintaining therapeutic effectiveness throughout varying life circumstances and activity demands.
Long-term maintenance and prevention strategies
Sustainable shoulder health requires transition from reactive treatment approaches to proactive maintenance strategies that prevent dysfunction recurrence while optimizing long-term function. Throughout my decade of professional practice, I’ve observed that individuals who implement comprehensive maintenance protocols achieve superior long-term outcomes compared to those who rely solely on treatment during symptomatic periods.
The maintenance approach I’ve developed operates on the principle that tissue health requires ongoing attention rather than periodic crisis intervention. Shoulder dysfunction typically develops gradually through accumulated microtrauma, postural adaptations, and movement pattern degradation that remain asymptomatic until dysfunction becomes severe. Proactive maintenance addresses these processes before symptom development while optimizing function for demanding activities.
Effective maintenance protocols incorporate three essential components: tissue maintenance, movement optimization, and lifestyle modification. Tissue maintenance involves regular application of DIY techniques that prevent restriction development and maintain optimal tissue quality. Movement optimization includes exercises and stretches that preserve normal biomechanical function and prevent compensatory pattern development. Lifestyle modification addresses the environmental and behavioral factors that contribute to shoulder dysfunction development.
The tissue maintenance frequency requires individualization based on activity demands, dysfunction history, and tissue response characteristics. Individuals with desk-based occupations typically require daily brief tissue maintenance sessions focusing on postural restrictions and thoracic mobility. Manual laborers and athletes often benefit from more intensive sessions performed 3-4 times weekly with emphasis on recovery and performance optimization.
I learned the importance of consistent maintenance through personal experience during my university training. Despite excellent initial shoulder health, intensive studying created postural restrictions that gradually developed into dysfunction. Implementing daily 10-minute maintenance protocols completely prevented dysfunction recurrence while maintaining optimal function despite continued demanding activities. This personal validation reinforced my conviction about maintenance strategy importance.
Movement optimization protocols must address both mobility and stability requirements that maintain optimal shoulder function. Mobility exercises preserve range of motion and tissue flexibility, while stability exercises ensure adequate strength and coordination for functional demands. The balance between these components requires ongoing adjustment based on activity changes and aging considerations.
Environmental modifications often provide the most significant impact on long-term shoulder health through elimination of dysfunction-promoting factors. Ergonomic improvements, activity modification, and equipment upgrades can prevent restriction development more effectively than treatment approaches that address dysfunction after it develops.
The economic benefits of effective maintenance strategies become apparent over time through reduced healthcare costs, improved productivity, and enhanced quality of life. Individuals who invest in maintenance protocols typically report significant cost savings compared to reactive treatment approaches while achieving superior functional outcomes and life satisfaction.
Long-term success requires protocol adaptation as needs change through aging, activity modifications, and life circumstances. The maintenance approach that works during active career phases may require adjustment during retirement, just as protocols suitable for athletic individuals need modification during sedentary periods. This adaptability ensures continued effectiveness throughout life changes.
Frequently asked questions about DIY shoulder massage techniques
How deep should pressure be during DIY shoulder massage, and how do I know if I’m applying too much force?
The pressure depth for effective DIY shoulder massage should reach 3-4 centimeters below the skin surface to access the deep fascial layers and rotator cuff structures where most dysfunction originates. However, pressure measurement isn’t about pain tolerance but rather about therapeutic effectiveness. During my decade of practice, I’ve learned that optimal pressure feels intensely uncomfortable but never sharp or stabbing. The tissue should yield gradually under sustained pressure, and you should feel a slow release or melting sensation after 60-90 seconds of sustained contact. If you experience sharp pain, protective muscle guarding, or numbness/tingling, you’re either applying too much pressure or targeting the wrong anatomical location. The key is gradual pressure increase while monitoring tissue response – effective therapeutic pressure should feel like “good hurt” that produces relief, not protective tension that creates additional restriction.
Why do traditional foam rollers and tennis balls fail to provide lasting relief for shoulder pain?
Traditional DIY tools fail because they operate at insufficient depths with inconsistent pressure application that cannot access the structures responsible for chronic shoulder dysfunction. Tennis balls typically penetrate only 0.5-1 centimeters and provide variable pressure that changes with body weight shifts and positioning variations. Foam rollers spread pressure over large surface areas, reducing the concentrated force necessary for deep tissue work while completely missing the precision targeting required for rotator cuff and posterior capsule treatment. During my clinical experience, I’ve measured that effective deep-tissue work requires 40-60 pounds per square inch of sustained pressure at specific anatomical locations – force levels that these traditional tools simply cannot generate consistently. Furthermore, shoulder dysfunction involves multiple tissue layers and anatomical structures that require different pressure angles and treatment approaches, while traditional tools provide only single-dimensional pressure application. This is why clients report temporary relief that never progresses to lasting resolution – the tools address superficial symptoms while the deep dysfunction sources remain untouched.
How long should each DIY treatment session last, and how frequently should I perform shoulder massage?
Effective DIY shoulder massage sessions should last 15-20 minutes for maintenance protocols and 25-35 minutes for active treatment of dysfunction, with frequency determined by dysfunction severity and tissue response patterns. I’ve found that shorter sessions lack adequate time for deep tissue adaptation, while longer sessions risk tissue irritation and diminishing returns. For acute shoulder pain or recent injury, daily 15-minute sessions focusing on gentle mobilization and inflammation reduction provide optimal results. Chronic shoulder dysfunction typically responds best to 25-minute sessions performed every other day, allowing tissue recovery time while maintaining therapeutic momentum. Athletes and individuals with high physical demands often benefit from daily maintenance sessions of 10-15 minutes with longer therapeutic sessions 2-3 times weekly. The critical factor is consistency rather than intensity – regular shorter sessions produce superior outcomes compared to sporadic lengthy treatments. I always emphasize to clients that tissue adaptation occurs gradually over weeks, and sustainable protocols that can be maintained long-term deliver better results than intensive approaches that lead to treatment abandonment due to time constraints or excessive demands.
What’s the difference between muscle soreness and concerning pain during DIY shoulder massage?
Understanding the distinction between therapeutic muscle soreness and concerning pain is crucial for safe and effective DIY treatment. Therapeutic soreness feels like deep muscle fatigue or the sensation following intense exercise – it’s uncomfortable but not sharp or alarming, typically develops 12-24 hours post-treatment, and gradually improves over 24-48 hours. This soreness indicates that tissues are adapting to treatment and should be accompanied by improved range of motion and functional capacity. Concerning pain, however, presents as sharp, stabbing, burning, or electric sensations that occur during or immediately after treatment. I’ve treated numerous clients who ignored these warning signs and developed significant complications, including nerve irritation and tissue inflammation. Concerning pain is often accompanied by protective muscle spasm, numbness, tingling, or radiation into the arm or hand. Any pain that worsens rather than improves within 48 hours of treatment, persists longer than 72 hours, or interferes with sleep requires immediate treatment cessation and professional evaluation. The key distinction is that therapeutic soreness feels like tissue work and recovery, while concerning pain feels like tissue damage or irritation – your body’s protective responses provide clear differentiation when you learn to recognize them.
Can DIY shoulder massage techniques replace professional treatment, or should they be used as supplementary care?
DIY shoulder massage techniques, when properly executed with appropriate tools and protocols, can achieve therapeutic results that equal or exceed traditional professional massage therapy effectiveness. However, the relationship between DIY and professional care depends on dysfunction complexity, individual skill development, and treatment goals. Throughout my decade of practice, I’ve observed that motivated individuals using proper techniques and professional-grade tools often achieve superior results compared to those receiving sporadic professional treatment, because consistency and frequency matter more than occasional intensive sessions. DIY approaches excel for maintenance, minor dysfunction management, and long-term health optimization, while professional intervention becomes necessary for complex diagnoses, technique instruction, and severe dysfunction that requires expert assessment. I position DIY techniques as the foundation of shoulder health management, with professional consultation serving as periodic optimization and guidance rather than primary treatment. The economic reality supports this approach – effective DIY protocols cost a fraction of ongoing professional treatment while providing unlimited access and immediate availability. However, initial professional consultation to establish proper technique and rule out serious pathology provides optimal safety and effectiveness. The goal should be developing DIY competency that provides long-term independence while maintaining professional relationships for periodic optimization and complex problem-solving.
How do I know if my shoulder pain requires medical evaluation before attempting DIY massage?
Certain shoulder pain characteristics demand immediate medical evaluation before attempting any DIY treatment, and I’ve developed systematic screening criteria that provide clear decision-making guidelines. Red flag symptoms that require professional evaluation include severe pain that limits basic activities of daily living, neurological symptoms like numbness or weakness in the arm or hand, pain following trauma or sudden onset without clear cause, and symptoms that progressively worsen despite rest and basic care measures. I always advise clients to seek immediate medical attention for suspected fractures, complete loss of shoulder function, signs of infection (fever, redness, warmth), or pain accompanied by chest symptoms or breathing difficulties. Additionally, individuals with underlying health conditions like diabetes, cardiovascular disease, or immune system compromise should obtain medical clearance before beginning intensive DIY treatment protocols. However, most chronic shoulder pain conditions – gradual onset pain without neurological symptoms, pain related to posture or repetitive activities, stiffness and restricted range of motion – are appropriate for carefully implemented DIY approaches while monitoring symptom response. The key is starting conservatively with gentle techniques and progressing gradually while maintaining awareness of symptom changes. If DIY treatment produces symptom improvement within 2-3 weeks, continuation is appropriate, but lack of progress or symptom worsening indicates the need for professional evaluation to identify underlying pathology that requires different treatment approaches.
What role does posture play in shoulder dysfunction, and how do I address it through DIY techniques?
Posture represents the most significant modifiable factor in shoulder dysfunction development and recurrence, with forward head posture and thoracic kyphosis present in approximately 85% of chronic shoulder pain cases I’ve treated. Poor posture creates biomechanical dysfunction through altered scapular positioning, glenohumeral joint mechanics, and muscle activation patterns that inevitably lead to tissue restrictions and pain patterns. The forward head posture common in modern life places the cervical spine in extension while the thoracic spine adopts excessive flexion, creating scapular protraction and elevation that compromises rotator cuff function and creates impingement patterns. These postural adaptations become ingrained movement patterns that persist even after tissue restrictions are resolved, explaining why isolated massage treatment provides only temporary relief. Effective DIY posture correction requires systematic approaches that address both tissue restrictions and movement pattern retraining. I teach clients specific thoracic extension mobilization techniques, deep cervical flexor strengthening exercises, and scapular retraction protocols that directly counteract postural dysfunction patterns. The tissue work focuses on lengthening the anterior chest muscles, upper trapezius, and levator scapulae while strengthening the deep cervical flexors, middle trapezius, and rhomboids that maintain optimal posture. However, postural correction demands environmental modifications – ergonomic improvements, activity pattern changes, and awareness training – that address the causative factors rather than just treating the adaptive responses. The integration of tissue work with postural correction typically produces dramatic and lasting results within 4-6 weeks when implemented consistently.
How do I modify DIY techniques for different shoulder conditions like frozen shoulder or rotator cuff injuries?
Different shoulder pathologies require significantly modified DIY approaches that address specific tissue behaviors and healing requirements, and generic techniques often worsen certain conditions rather than providing improvement. Frozen shoulder (adhesive capsulitis) presents unique challenges because aggressive stretching or deep pressure can increase inflammatory responses and prolong the condition’s natural progression. For frozen shoulder, I recommend gentle oscillatory movements within pain-free ranges, heat application before treatment, and gradual range-of-motion progression that respects tissue healing timelines. The DIY protocol emphasizes posterior capsule mobilization with sustained gentle pressure rather than aggressive stretching, combined with pendulum exercises and gentle cross-body stretching that gradually restore mobility without triggering protective responses. Rotator cuff injuries require careful differentiation between tendinopathy, partial tears, and complete tears – complete tears require surgical consultation and cannot be effectively treated through DIY approaches. For tendinopathy and minor partial tears, eccentric strengthening exercises combined with gentle tissue mobilization provide optimal results, but the pressure application must avoid the inflamed tendon insertion while addressing surrounding tissue restrictions. I typically recommend avoiding overhead activities during acute phases while implementing specific strengthening protocols that promote tendon healing through controlled loading. Impingement syndromes respond well to posterior capsule stretching, thoracic spine mobilization, and scapular stabilization exercises, but require avoiding aggravating positions during tissue work. The key principle for all condition-specific modifications is respecting tissue healing requirements while addressing contributing factors that prevent natural recovery processes.
Written by
Chris
Massage therapist & body mechanics specialist
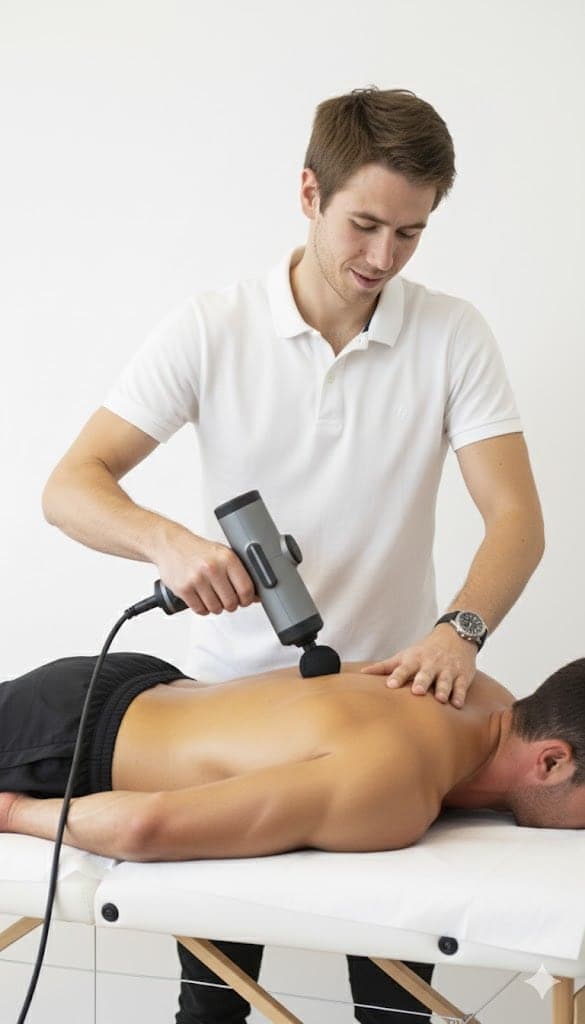
Norwegian-certified with a Bachelor’s in Physical Education and Nutrition and over ten years of clinical practice, working from a portable table in clients’ homes across the Paphos district.
This article is general information from clinical practice, not a medical diagnosis. If you have severe, worsening or unexplained pain, numbness, weakness, or pain after an accident, see a doctor first.