
DIY Mechanical Deep Tissue Therapy: A Professional Guide to Effective Home Treatment
In short
Learn how to perform DIY mechanical deep tissue therapy at home with professional equipment and techniques. Discover the methods that deliver consistent, deep-level results without relying on traditional hands-only approaches.
The traditional massage industry has sold you a comfortable lie: that healing touch must always come from human hands. After a decade of clinical practice and thousands of treatments, I can tell you definitively that this simply isn’t true. DIY mechanical deep tissue therapy represents a paradigm shift in how we approach chronic pain and muscular dysfunction—and you can implement these methods in your own home with the right knowledge and equipment.
My background in Physical Education and Nutrition from Norway, combined with ten years of specialized practice, has taught me something most therapists won’t admit: human hands have biological limitations that prevent them from delivering the depth, precision, and consistency required for lasting tissue remodeling. This isn’t about replacing the therapeutic relationship—it’s about acknowledging that mechanical assistance can achieve what manual therapy cannot.
The question isn’t whether DIY mechanical deep tissue therapy works. The question is whether you’re willing to invest in understanding the biomechanics, acquiring proper equipment, and committing to a results-driven protocol rather than chasing temporary relief.
Understanding the Biomechanical Foundation of Mechanical Deep Tissue Therapy
Before you purchase a single piece of equipment, you need to understand what you’re actually treating. Most people approach pain relief with a fundamentally flawed mental model. They believe pain is the problem. It isn’t. Pain is the symptom—a warning signal that underlying tissue has been compromised, shortened, or bound by fascial adhesions that restrict normal movement patterns.
When I work with clients who’ve spent years cycling through chiropractors, physical therapists, and traditional massage practitioners, they all describe the same frustrating pattern: temporary relief followed by inevitable return to baseline dysfunction. This happens because surface-level manipulation doesn’t address the architectural changes that occur in chronically stressed tissue.
The Tissue Depth Problem
The human hand, regardless of training or strength, can only effectively penetrate 2-3 centimeters into muscle tissue. Deeper muscles—the multifidus in your lower back, the psoas connecting your spine to your femur, the rotator cuff muscles buried beneath your deltoid—remain untouched by conventional massage. These deeper structures are precisely where chronic holding patterns develop and where mechanical intervention becomes necessary.
I’ve treated professional athletes whose careers were threatened by “mysterious” chronic pain that multiple specialists couldn’t resolve. In virtually every case, the root cause was deep-tissue dysfunction that manual therapy simply couldn’t reach. Mechanical tools don’t suffer from hand fatigue, inconsistent pressure application, or limited penetration depth.
The Precision Requirement
Effective tissue remodeling requires sustained, precisely calibrated pressure delivered at specific angles to target individual muscle bellies and fascial planes. A physical therapist’s thumbs deliver approximately 30-40 pounds of force before fatigue sets in. My specialized mechanical equipment delivers 60-150 pounds of controlled, sustained pressure—and maintains that pressure for however long the tissue requires to release.
This isn’t about brutality. This is about biomechanical reality. Chronic fascial restrictions don’t respond to gentle coaxing. They respond to sustained mechanical stress that triggers the mechanotransduction pathways governing tissue remodeling.
Essential Equipment for DIY Mechanical Deep Tissue Therapy
The market is flooded with percussion devices and foam rollers marketed as “professional-grade recovery tools.” Most are toys. If you’re serious about DIY mechanical deep tissue therapy that produces lasting results rather than temporary distraction, you need equipment that meets specific performance criteria.
The Core Mechanical Device
Your primary tool must deliver three non-negotiable features: adjustable depth penetration, variable speed control, and ergonomic design that allows sustained application without user fatigue. I use a specialized machine that most practitioners don’t have access to—but several consumer-grade alternatives exist if you understand what specifications matter.
| Feature | Minimum Requirement | Why It Matters |
|---|---|---|
| Amplitude | 14-16mm minimum | Determines actual penetration depth into tissue |
| Stall Force | 50+ lbs | Prevents device from stopping under pressure |
| Speed Range | 1200-3200 RPM | Allows targeting different tissue types and depths |
| Battery Life | 2+ hours | Prevents interruption during extended sessions |
| Attachment Variety | Minimum 4 heads | Different tissues require different contact surfaces |
The percussion guns marketed to weekend warriors typically max out at 12mm amplitude with insufficient stall force. They’re adequate for post-workout flush but useless for addressing chronic dysfunction. You’re looking for professional-grade devices typically sold to physical therapy clinics, not the consumer electronics section.
Supporting Equipment and Environment
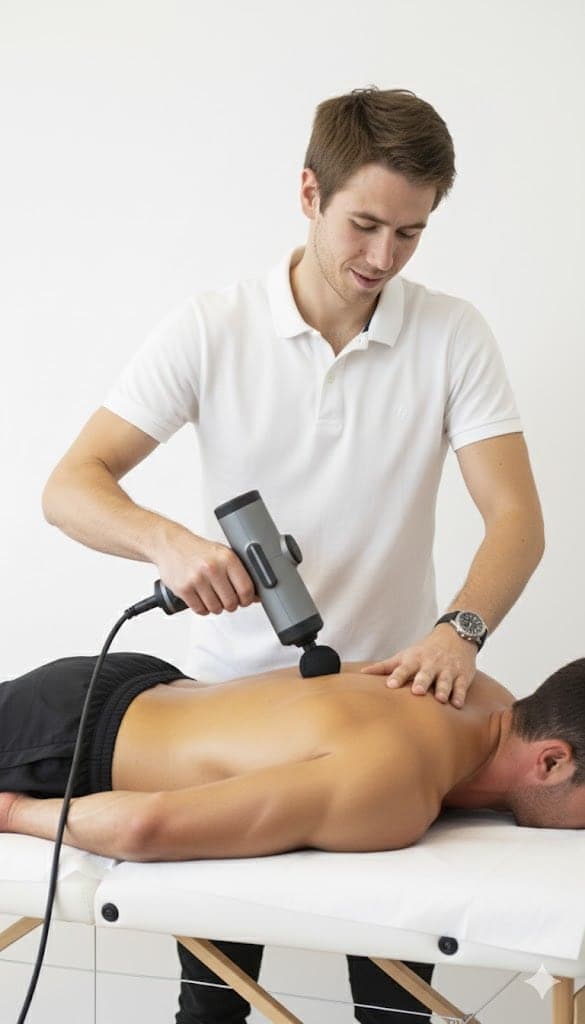
Effective mechanical therapy requires proper positioning. I travel to clients with a professional treatment bench because body positioning fundamentally determines treatment efficacy. For DIY application, you need:
- A firm, flat surface at appropriate height (dining table with padding works better than beds)
- Bolsters or rolled towels for positional support
- A full-length mirror for monitoring body positioning during self-application
- Quality massage oil or gel to reduce surface friction without compromising grip
- Heating pad for pre-treatment tissue preparation
Most people attempt mechanical therapy while seated or standing, using their free hand to stabilize the device. This limits the pressure you can apply, compromises your biomechanical advantage, and makes consistent treatment nearly impossible. Proper positioning isn’t optional—it’s foundational.
The Scientific Protocol for DIY Treatment Sessions
Equipment without methodology produces random results. I’ve developed a systematic approach over thousands of clinical hours that you can adapt for self-application. This protocol is based on the same biomechanical principles I use with professional athletes and chronic pain sufferers who’ve exhausted conventional options.
Phase One: Tissue Assessment and Preparation
You cannot treat tissue you don’t understand. Before touching your mechanical device, you need to map your dysfunction. Stand in front of your mirror and perform a basic postural assessment:
- Photograph yourself from front, back, and both sides in minimal clothing
- Note visible asymmetries: one shoulder higher, hip rotation, head tilt
- Perform basic range-of-motion tests: shoulder circles, trunk rotation, hip flexion
- Document pain location and intensity (1-10 scale) at rest and during movement
This isn’t perfunctory paperwork. I’ve seen clients who insisted their problem was lower back pain when the actual dysfunction originated in their hip flexors. The body compensates brilliantly—and compensation patterns mask root causes. Your assessment reveals where to begin treatment.
Apply heat to target areas for 15-20 minutes before mechanical work. This increases tissue pliability and local blood flow, making the tissue more responsive to mechanical intervention. Cold, contracted tissue resists remodeling and increases injury risk.
Phase Two: Systematic Mechanical Application
Start with the attachment head that provides the broadest surface contact—typically a large ball or flat head. Aggressive initial targeting with pointed attachments frequently causes protective muscle guarding that defeats the entire purpose. You’re trying to convince the tissue to release, not forcing submission.
The actual technique follows a specific progression I’ve refined over ten years:
Layer 1 – Superficial Fascial Preparation (3-5 minutes per region): Set your device to medium amplitude and low speed (1800-2000 RPM). Work in broad, overlapping strokes following muscle fiber direction. You’re warming the tissue and beginning to address superficial adhesions. Pressure should feel intense but not painful—a 6/10 sensation.
Layer 2 – Targeted Mechanical Release (8-12 minutes per region): Switch to a smaller, more focused attachment. Increase amplitude to maximum and adjust speed based on tissue response (denser tissue tolerates higher speeds). Identify trigger points and fascial restrictions through palpation—they feel like knots, bands, or areas of increased tissue density.
Here’s where most DIY attempts fail: they move too quickly. When you locate a restriction, you must maintain sustained pressure for 60-90 seconds minimum. The tissue will initially resist, then gradually soften as the mechanoreceptors signal the nervous system that the perceived threat isn’t real. If you bounce around chasing discomfort, you achieve nothing lasting.
Layer 3 – Functional Integration (5-7 minutes per region): Return to broader attachment and lower intensity. Your goal here is reintegrating the released tissue into functional movement patterns. Work through full range of motion while applying the device—shoulder circles while treating the rotator cuff, hip flexion during psoas work.
Phase Three: Post-Treatment Integration
The mechanical work is only half the protocol. I see clients who receive professional treatment but then immediately return to the same dysfunctional movement patterns that created their problems. Post-treatment integration determines whether your results last days or months.
Immediately after mechanical therapy:
- Perform gentle active range-of-motion exercises through newly available movement
- Apply ice to any areas of significant tissue response (helps manage inflammatory response)
- Hydrate aggressively (metabolic waste released from tissue needs to be filtered and eliminated)
- Avoid aggressive exercise or loading for 24-48 hours (tissue is temporarily vulnerable during remodeling)
Region-Specific Treatment Protocols
Generic advice produces generic results. Effective DIY mechanical deep tissue therapy requires understanding the unique characteristics and common dysfunction patterns of specific regions. I’ll share the protocols I use for the most frequently treated areas.
Lower Back and Lumbar Spine
Lower back pain is nearly universal in modern populations, and nearly always misunderstood. The lumbar spine itself is rarely the problem—it’s the victim of poor biomechanics elsewhere in the kinetic chain. However, the paraspinal muscles, multifidus, and quadratus lumborum frequently develop chronic tension patterns that perpetuate dysfunction.
For DIY mechanical treatment, positioning is critical. Lie prone (face down) on your treatment surface with a small bolster under your hips to maintain neutral spine position. This prevents hyperextension and allows the paraspinal muscles to relax rather than contracting to maintain position.
Start at the sacrum—the triangular bone at the base of your spine—and work systematically upward along the erector spinae muscles, approximately two inches lateral to the spine on each side. Use a rounded attachment at medium speed and maximum amplitude. The lower back tolerates significant pressure, but work gradually toward your maximum tolerance rather than starting there.
I’ve treated construction workers whose lower backs felt like concrete slabs from years of poor lifting mechanics. Their tissue required multiple sessions of sustained mechanical pressure before achieving lasting release. Expect this region to require the highest pressure and longest duration of treatment.
Neck and Upper Trapezius
The modern epidemic of forward head posture creates chronic overload of the upper trapezius, levator scapulae, and suboccipital muscles. These tissues are simultaneously overworked and biomechanically dysfunctional—a combination that creates stubborn trigger points and referred pain patterns.
Self-treating the neck requires extreme care. The cervical spine is mobile and vulnerable, surrounded by critical neurovascular structures. You’re targeting muscle tissue exclusively, avoiding direct pressure on the vertebrae or carotid arteries.
Sit upright in a supportive chair. Tilt your head away from the side being treated, creating slack in the upper trapezius. Use the smallest ball attachment at low speed and moderate amplitude. Work from the base of the skull downward toward the shoulder, following the muscle fibers.
The sensation should be intense but never sharp or radiating. Sharp pain indicates nerve compression—stop immediately and reassess your positioning. I’ve had clients create additional problems by aggressively attacking neck tension without understanding the anatomical complexity they’re working with.
Hip Flexors and Psoas Complex
This region represents the most underappreciated source of chronic pain and dysfunction I encounter professionally. The psoas major connects your lumbar spine to your femur, functioning as a primary hip flexor and postural stabilizer. In populations that sit extensively, the psoas adaptively shortens, creating anterior pelvic tilt, compensatory lower back tension, and restricted hip mobility.
Treating the psoas mechanically requires accessing it through the abdominal wall—something most people find uncomfortable initially. Lie supine (face up) with knees bent and feet flat. Use a small, pointed attachment at low speed and moderate amplitude.
The psoas lies deep to your abdominal contents, approximately halfway between your navel and hip bone, three to four inches deep. You’re working through layers of tissue to reach it. Start at the superior attachment (near your lower ribs) and work downward toward the hip, following the muscle’s diagonal orientation.
This treatment produces unique sensations—often a deep ache or the feeling of “good pain” as chronically shortened tissue finally releases. I’ve had clients report immediate improvement in hip mobility and lower back comfort after a single thorough psoas release. The tissue is that influential in overall biomechanics.
Common Mistakes That Sabotage DIY Mechanical Therapy Results
I’ve observed countless individuals attempt mechanical deep tissue therapy with inadequate results. The equipment works—the methodology is sound—but execution determines outcomes. These errors appear repeatedly:
Mistake One: Chasing Pain Instead of Treating Dysfunction
Your brain is exceptionally skilled at generating pain signals. Those signals don’t necessarily correlate with the location of actual tissue dysfunction. I regularly treat knee pain that originates in hip mechanics, shoulder pain caused by thoracic spine restrictions, and headaches rooted in jaw tension.
The most painful area is rarely the primary problem. It’s the compensatory tissue that’s working overtime to manage dysfunction elsewhere. If you only treat what hurts, you’re managing symptoms while the underlying cause continues operating.
Effective treatment requires working systematically through the entire kinetic chain related to your complaint. Knee problems demand treatment of ankle mobility, hip function, and core stability. Shoulder issues require addressing thoracic spine position, scapular control, and cervical mechanics. Pain is your starting point for investigation, not your treatment endpoint.
Mistake Two: Insufficient Treatment Duration and Pressure
The most common question I hear: “How long should I use the device on each area?” The answer frustrates people seeking simple protocols: until the tissue releases. Sometimes that’s 30 seconds. Sometimes it’s five minutes of sustained pressure at a single point.
Chronic fascial restrictions develop over months or years. They don’t dissolve with 15 seconds of percussion therapy. I use sustained mechanical pressure at specific points until I feel the tissue soften, the client’s breathing pattern changes signaling nervous system relaxation, and range of motion demonstrably improves.
Your DIY sessions should last 30-45 minutes minimum for comprehensive treatment of a specific region. Brief, frequent sessions produce minimal lasting change. You’re trying to trigger biological remodeling processes that require sufficient mechanical stimulus to activate.
Mistake Three: Inconsistent Treatment Frequency
Tissue remodeling follows biological timelines, not motivational cycles. I structure client protocols around optimal tissue response windows—typically 48-72 hours between intensive sessions on the same region. More frequent treatment prevents adequate recovery. Less frequent treatment allows compensatory patterns to re-establish.
Most people approach therapy reactively: they treat when pain becomes unbearable, then stop when it improves. This produces the classic cycle of temporary relief followed by inevitable return to dysfunction. You’re treating tissue architecture, not pain levels.
An effective DIY protocol involves 2-3 focused sessions weekly for 4-6 weeks on a problematic region, then maintenance sessions weekly or biweekly. Front-loading intensive treatment accelerates remodeling, while maintenance prevents regression.
Measuring Progress: The Metrics That Matter
Results-driven therapy requires objective measurement. Subjective pain scales have value, but they’re influenced by stress, sleep quality, and a dozen other variables that have nothing to do with tissue state. I use specific metrics to track treatment efficacy:
Range of Motion Assessment
Photograph or video yourself performing standard range of motion tests before beginning treatment and at two-week intervals. Hip flexion, shoulder abduction, trunk rotation, and spinal flexion provide objective data about functional improvement.
I’ve had clients swear their condition wasn’t improving even as their range of motion increased by 30-40 degrees. The brain adapts remarkably quickly to new normal states, making subjective assessment unreliable. Numbers don’t lie.
Functional Performance Markers
How long can you sit comfortably? How many stairs can you climb before noticing hip or knee discomfort? Can you turn your head fully to check blind spots while driving? These daily function markers reveal whether your therapy produces real-world improvement or just feels good temporarily.
Document specific limitations at baseline, then reassess monthly. If treatment is effective, you’ll see progressive improvement in functional capacity independent of pain levels.
Tissue Quality Changes
As you develop palpation skills, you’ll notice texture changes in treated tissue. Chronic restrictions feel dense, ropy, and resistant. Successfully remodeled tissue feels supple, mobile, and responsive. This tactile feedback tells you whether your mechanical pressure is adequate and properly targeted.
When DIY Mechanical Therapy Isn’t Enough
I believe strongly in patient autonomy and self-directed care. However, honesty requires acknowledging that some conditions exceed DIY management capacity. After ten years of clinical practice, I can identify scenarios where professional intervention becomes necessary.
Complex pain patterns involving multiple regions, neurological symptoms (numbness, tingling, radiating pain), acute injury with significant swelling or bruising, and conditions that don’t respond to 6-8 weeks of consistent DIY treatment all warrant professional assessment. I’m not protecting my professional territory—I’m acknowledging that effective treatment requires matching intervention to condition complexity.
When I travel to a client’s location with professional equipment and bring my decade of anatomical expertise, I can assess and treat dysfunction that requires clinical-level skill. My specialized machine delivers precision, power, and consistency that consumer devices can’t replicate. I can feel tissue quality changes that require years of practice to detect. I can adjust treatment in real-time based on subtle client responses.
DIY mechanical deep tissue therapy works brilliantly for maintenance, injury prevention, and managing straightforward muscular tension. It represents a massive upgrade from hoping your symptoms resolve spontaneously. But it has limits.
Building a Sustainable Long-Term Protocol
The question isn’t whether mechanical therapy works. The question is whether you’ll implement it consistently enough to produce lasting change rather than temporary relief. I’ve spent a decade building dedicated partnerships with clients because single sessions are nearly worthless for chronic conditions.
Your DIY protocol should follow this framework:
Months 1-2: Intensive Remodeling Phase
- Three sessions weekly targeting primary dysfunction regions
- 40-60 minutes per session
- Progressive increase in pressure as tissue tolerance improves
- Weekly documentation of range of motion and functional markers
Months 3-4: Consolidation Phase
- Two sessions weekly maintaining treatment regions
- 30-45 minutes per session
- Focus shifts toward functional integration and movement pattern correction
- Begin addressing secondary compensation patterns
Month 5+: Maintenance Phase
- One to two sessions weekly as needed
- 20-30 minutes targeting areas of recurring tension
- Emphasis on prevention rather than correction
- Periodic reassessment of overall biomechanics
This timeline assumes consistent implementation and appropriate equipment. It also assumes you’re addressing underlying causes—correcting the movement patterns, ergonomic factors, and training errors that created your dysfunction initially. Mechanical therapy treats tissue, but if you continue loading that tissue dysfunctionally, you’ll need treatment indefinitely.
The Investment Mindset Versus the Expense Mentality
Quality mechanical therapy equipment costs a wide range of costs for devices that meet the specifications I’ve outlined. Many people balk at this price point, comparing it to the session price (see current pricing) percussion guns at big-box retailers. This is expense mentality—evaluating cost without considering value delivered.
I position my professional service as an investment in long-term health, not an expense for temporary relief. The same framework applies to DIY equipment. A well-made device that enables effective treatment three times weekly for years costs the per-session price after the first year. That same investment would buy perhaps four professional massage sessions that deliver temporary results.
More importantly, chronic pain exacts enormous costs: lost work productivity, degraded quality of life, restricted activity participation, pharmaceutical dependence, and potential surgical intervention. A recent client calculated he’d spent over a substantial sum on various practitioners over three years addressing chronic shoulder dysfunction. Six weeks of focused mechanical therapy with proper protocol produced more improvement than everything previous combined.
The equipment investment isn’t expensive—ongoing dysfunction is expensive.
Frequently Asked Questions About DIY Mechanical Deep Tissue Therapy
Can mechanical devices actually replace skilled hands for deep tissue work?
This question reveals a fundamental misunderstanding of what skilled hands can and cannot accomplish. Human hands excel at assessment, providing nuanced feedback, and creating therapeutic relationships. They cannot deliver sustained pressure at therapeutic depths without fatigue, cannot maintain precise pressure calibration, and cannot work consistently session after session.
I use mechanical equipment precisely because it accomplishes what hands cannot—deep, sustained, precisely controlled pressure that triggers tissue remodeling. This isn’t replacement; it’s acknowledging that different tools serve different purposes. I still use my hands for assessment and superficial work, but the mechanical device handles what hands cannot.
How do I know if I’m applying enough pressure?
Effective pressure produces intense sensation—typically described as “good pain” or “therapeutic discomfort”—that stays localized to the treatment area. You should feel like the device is reaching deep tissue and creating a releasing sensation, not surface-level percussion. On a 0-10 scale, you’re targeting 6-7: challenging but sustainable.
Sharp, radiating, or burning pain indicates excessive pressure or poor positioning. Numbness or tingling suggests nerve compression—stop immediately. Mild soreness lasting 24-48 hours post-treatment is normal and indicates successful tissue disruption. Severe pain lasting longer suggests overtreatment.
What’s the difference between percussion therapy and deep tissue therapy?
This distinction matters critically. Percussion devices deliver rapid, shallow impacts that stimulate blood flow and provide neurological override of pain signals. They work superficially and temporarily. Deep tissue therapy—whether manual or mechanical—applies sustained pressure that physically deforms tissue, breaks up adhesions, and triggers remodeling processes.
Most consumer devices marketed as “massage guns” provide percussion, not deep tissue therapy. They feel pleasant and provide temporary relief, but they don’t produce lasting structural change. You need sustained pressure at therapeutic depths, not rapid-fire surface stimulation.
How long before I see results from DIY mechanical therapy?
Acute tension typically responds within one to three sessions. You’ll notice improved range of motion and reduced discomfort almost immediately. Chronic dysfunction—problems present for months or years—requires 4-8 weeks of consistent treatment before substantial improvement appears.
I tell clients that tissue remodeling follows biological timelines, not wishful thinking. You’re literally restructuring the physical architecture of fascial tissue. That process takes time. Anyone promising instant lasting results is lying or treating superficially.
Expect noticeable improvement in specific metrics (range of motion, functional capacity) within two weeks. Expect substantial pain reduction within 4-6 weeks. Expect full resolution of chronic patterns within 3-4 months of consistent, intelligent treatment.
Can I overtrain or damage tissue with mechanical therapy?
Absolutely. Mechanical devices amplify both effective treatment and treatment errors. Excessive pressure, inappropriate duration, or poor technique can create tissue trauma rather than therapeutic remodeling. This is why protocol matters.
Signs of overtreatment include: severe soreness lasting more than 72 hours, visible bruising, increased pain levels, or decreased range of motion. If you experience these, you’re either treating too aggressively or targeting tissue that’s not ready for mechanical intervention.
Start conservatively. Build pressure and duration gradually as you develop technical skill and tissue tolerance. Remember that effective therapy challenges tissue while respecting its current state and capacity for response.
Should I use mechanical therapy before or after exercise?
This depends entirely on your goal. Pre-exercise mechanical work should be brief, superficial, and focused on activation—essentially advanced warm-up. You’re increasing blood flow and neural activation, not pursuing deep tissue release. Save five to seven minutes at light intensity.
Post-exercise is when deeper mechanical therapy becomes appropriate. Tissue is warm, pliable, and metabolically active. This is your window for sustained, intensive work targeting chronic restrictions. Schedule 30-45 minute sessions on rest days or after lighter training when you’re not systemically fatigued.
I discourage aggressive deep tissue work immediately before competition or maximum effort training. Tissue is temporarily vulnerable during remodeling processes. You want stable, integrated tissue for performance, not recently disrupted tissue still reorganizing.
What about contraindications—when shouldn’t I use mechanical therapy?
Several conditions absolutely contraindicate mechanical deep tissue work: acute injury with active inflammation, unhealed fractures, deep vein thrombosis, active infection, cancer in the treatment area, severe osteoporosis, and pregnancy (especially abdomen and lower back). If you have any serious medical conditions, consult with your physician before beginning aggressive mechanical therapy.
Relative contraindications—situations requiring caution and modified treatment—include diabetes with neuropathy, autoimmune conditions affecting connective tissue, and chronic pain syndromes with central sensitization components. These don’t necessarily preclude mechanical therapy, but they demand more conservative protocols and professional guidance.
How do I integrate mechanical therapy with other treatment approaches?
Effective treatment of chronic dysfunction typically requires multi-modal approaches. Mechanical therapy addresses tissue quality. Corrective exercise addresses movement patterns. Nutrition supports tissue health and recovery capacity. Stress management prevents chronic sympathetic nervous system activation that perpetuates muscle tension.
I work with clients using a comprehensive framework where mechanical therapy provides the foundation of tissue remodeling, but succeeds only when paired with appropriate loading, movement correction, and lifestyle optimization. The device is powerful—but it’s not magic.
If you’re working with physical therapists, chiropractors, or other practitioners, mechanical therapy complements their work rather than replacing it. Inform them of your DIY protocol so they can adjust their treatment appropriately and monitor your progress.
The Reality of Lasting Results
I need to address a fundamental truth that most practitioners avoid stating directly: lasting results from any therapy—manual, mechanical, or otherwise—require lasting changes in the behaviors that created dysfunction originally. Mechanical deep tissue therapy can remodel tissue remarkably effectively. It cannot override biomechanics, prevent poor ergonomics, or compensate for movement patterns that chronically overload specific tissues.
When I work with clients through dedicated partnerships rather than one-off sessions, we address the complete picture: tissue quality, movement competency, loading patterns, and the lifestyle factors that influence tissue health. This comprehensive approach produces lasting results because we’re treating causes, not just symptoms.
Your DIY mechanical therapy protocol should exist within this larger framework. Use the device to remodel tissue and restore normal function. Then modify the behaviors—sitting posture, exercise technique, ergonomic setup, training volume—that created dysfunction initially. Otherwise you’re simply managing symptoms more effectively while the underlying cause continues operating.
I’ve treated countless individuals who achieved spectacular initial results, then gradually regressed because they returned to the same dysfunctional patterns. The tissue remodeled beautifully. The nervous system learned new movement options. But old habits proved stronger than new tissue quality.
The mechanical device is extraordinarily powerful. Your commitment to intelligent, consistent implementation determines whether that power produces temporary relief or lasting transformation. After ten years of professional practice, I can state with complete confidence: the methodology works. The question is whether you’ll work the methodology.
Taking Action: Your Next Steps
Knowledge without implementation produces nothing. You now understand the biomechanical principles underlying effective DIY mechanical deep tissue therapy, the equipment specifications that matter, the protocols that produce results, and the common errors that sabotage progress.
The next decision is yours. You can file this information away as interesting but not urgent—and continue managing chronic dysfunction through temporary measures. Or you can invest in proper equipment, commit to consistent implementation, and treat your tissue quality as seriously as you treat other aspects of your health and performance.
I travel to clients’ locations with professional equipment because I’ve built my practice around providing the absolute highest level of mechanical therapy available. That service delivers results that DIY approaches cannot match—because of equipment superiority, clinical expertise, and the accountability that comes from dedicated partnerships.
But DIY mechanical therapy, properly executed with appropriate equipment and intelligent protocols, represents an enormous upgrade over hoping your body spontaneously resolves chronic dysfunction. It puts powerful tools directly in your hands and eliminates dependence on practitioners who may or may not understand advanced mechanical methods.
Your body is the only one you have. Every day you operate with compromised tissue quality, restricted range of motion, and compensatory movement patterns is a day you’re not performing at your capacity. The investment required—financial, time, and effort—pales compared to the cost of ongoing dysfunction.
The tissue will respond. The question is whether you’ll provide the stimulus required for it to respond. After a decade of clinical practice and thousands of successful treatments, I know what works. Now you do too.
The only remaining variable is your commitment to implementation. Everything else—the science, the equipment, the protocols—is waiting for you to begin.
Written by
Chris
Massage therapist & body mechanics specialist
Norwegian-certified with a Bachelor’s in Physical Education and Nutrition and over ten years of clinical practice, working from a portable table in clients’ homes across the Paphos district.
This article is general information from clinical practice, not a medical diagnosis. If you have severe, worsening or unexplained pain, numbness, weakness, or pain after an accident, see a doctor first.